
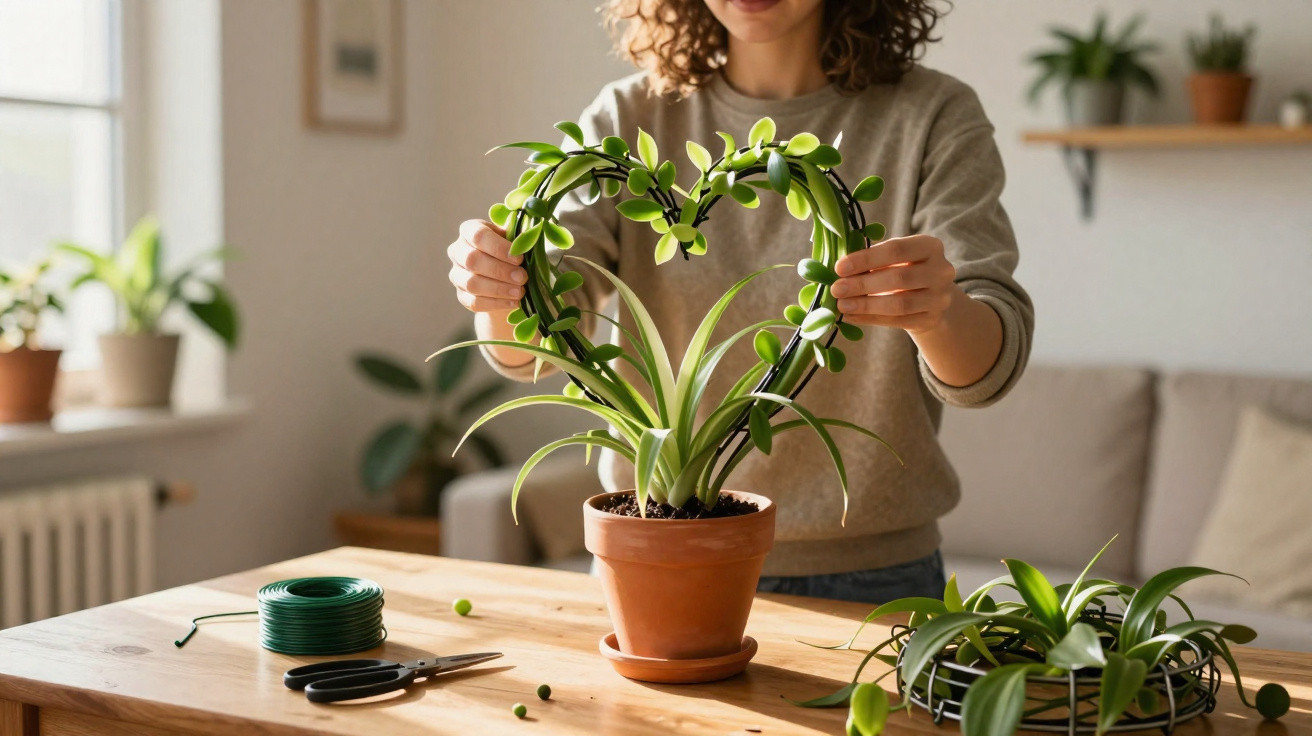
A pot overflowing with trailing leaves on a chest of drawers often conceals far more potential than its owner realises. This is the spider plant, also known as the green lily. It is considered easy to care for, hardy and suitable for families – but rarely a design feature. With a little guidance and one carefully chosen technique, however, it can become just that: a striking, almost sculptural plant that draws every eye in the living room.
Why the spider plant offers more than simply being “easy to care for”
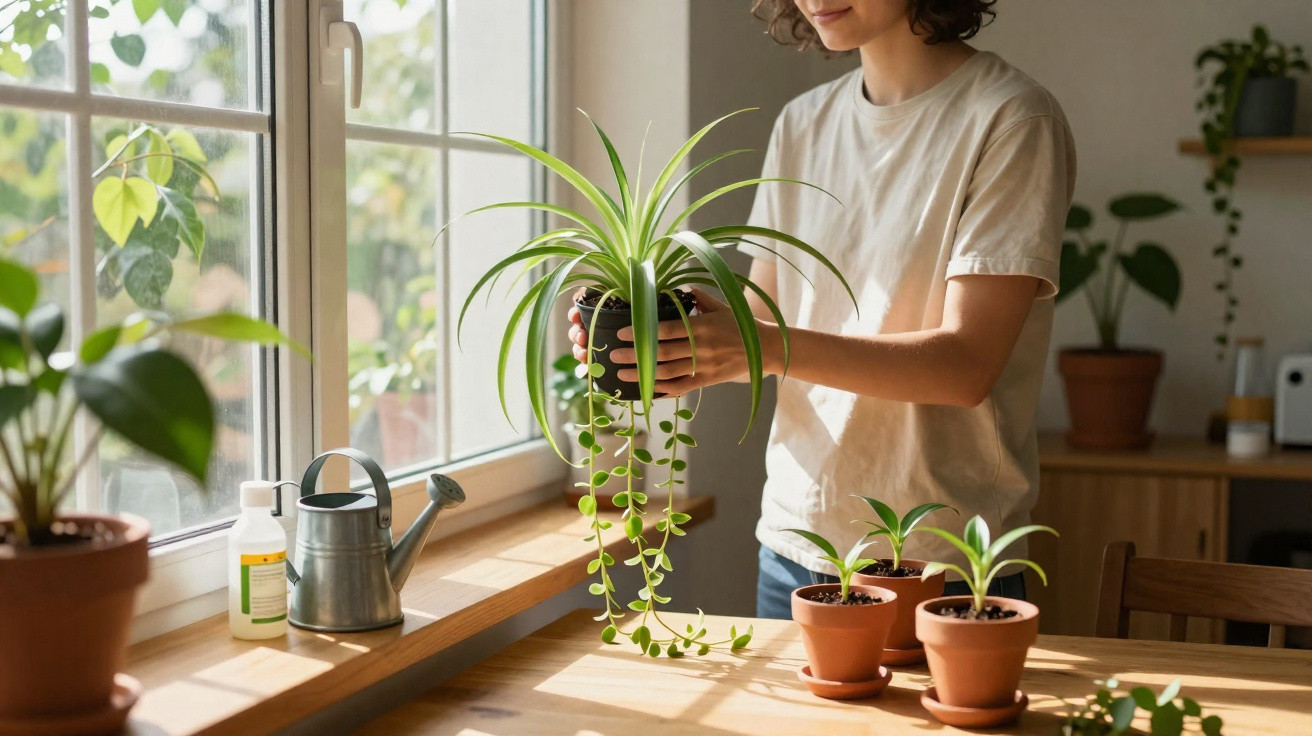
A typical spider plant is instantly recognisable: a dense rosette of green leaves with white stripes, from which long, slender shoots emerge. Small plantlets, known as offsets, grow at their ends. Hanging like little stars in the air, they are what gives the plant its distinctive appeal.
“Anyone who deliberately shapes the spider plant’s trailing shoots can turn it from an ordinary houseplant into a living sculpture.”
These pliable shoots are precisely the key. They are remarkably flexible, do not snap immediately and can be trained in a particular direction over several weeks. Rather than allowing them simply to grow freely into the room, you can guide, secure and shape them – much like bonsai, but considerably more easily.
The key idea: treat the plant as a “living sculpture”
The essential step is to stop viewing the spider plant as merely a potted plant and instead see it as material for a small piece of living art. Its long shoots create the “line drawing”, while the offsets resemble leaves or flowers arranged along that line.
Shapes that can be created with only a few curves work particularly well, including:
- a circle resembling a crown or wreath
- a heart for decorations at celebrations or for gifts
- a vertical column made from intertwined shoots
Whichever option you choose, the same principle applies: the more gently and gradually the shoots are accustomed to the intended shape, the healthier the plant will remain and the more harmonious the finished result will look.
Shaping spider plants with wire: wreaths and hearts
The simplest approach uses a lightweight wire frame. Sturdy yet easily bendable aluminium wire of the type sold for crafts is ideal. It will not rust and places very little strain on the plant.
How to make a green decorative wreath
- Prepare the wire: Bend it into a ring of the desired size and join the ends neatly.
- Choose suitable shoots: Use only strong shoots carrying several offsets. Leave weaker shoots untouched.
- Position the shoots: Lay the shoots loosely around the wire. Do not crease them; guide them in gentle arcs instead.
- Secure them: Attach them with soft plant ties or raffia loops. Avoid hard wire ties.
- Fill the gaps: Cut off surplus offsets and insert them into the compost in the pot – they root readily and make the base fuller.
Over time, the small rosettes continue growing, so the wreath becomes fuller and denser. After a few weeks, it develops into a circular arrangement that works perfectly as the centrepiece of a dining table.
A heart shape for romantic occasions
The same method works for a heart, with the wire frame being the only difference. The important point is to guide two long shoots of as equal a strength as possible from the bottom upwards, parallel across the frame. The offsets then form a kind of green outline along the heart’s curves.
Such a heart is ideally suited to:
- a formally laid table
- an eye-catching feature on a hallway console table
- a natural decorative element at a wedding or anniversary
The vertical option: a braided column of plant shoots
If you would rather create height than width, the shoots can be braided into a type of green column. This version does not use a metal ring, but a supporting cane, usually made from wood or bamboo.
Step by step to a green column
- Insert the cane: Place a sturdy cane in the centre of the pot, pushing it deep enough into the compost that it does not wobble.
- Gather several shoots: Select three to five long shoots and loosely braid them together.
- Secure them to the cane: Run the braided length closely alongside the cane and fasten it at regular intervals with ties.
- Allow time for growth: As time passes, the offsets fill the spaces between the shoots and the column looks more substantial.
“A simple trailing plant is transformed into a true ‘green totem’, making ideal use of narrow corners in the living room.”
This option is especially suitable where there is little floor or surface space available, such as beside an armchair, at the end of a low sideboard, or between a bookcase and the wall.
How to display your new plant sculpture
The shape alone does not create the full effect; its location matters just as much. Here are a few practical ideas:
- Wreath at the centre of the table: Positioned flat on the table, it keeps sightlines clear while the offsets fall gently downwards.
- Heart in the entrance area: A heart made from foliage creates a welcoming impression when displayed on a console table or chest of drawers.
- Braided column in a reading area: Beside an armchair, it gives the room structure without overwhelming it.
- Mini column on a bedside table: In compact bedrooms, a smaller version placed at eye level is often enough.
If you own several spider plants, you can combine different shapes: a wreath on the dining table, a column in the living room and a small heart on the windowsill. This creates a subtle yet clear design theme running through the home.
Care after shaping: keeping the plant healthy
After bending, braiding and fastening the shoots, it is worth giving the plant a small boost. Many amateur gardeners use a liquid fertiliser containing only a few straightforward nutrients, such as a nitrogen- and potassium-based mix. This encourages fresh growth and helps the plant fill any gaps in its shape more quickly.
At the same time, it is better to water slightly too little than too much. In most homes, allow the top layer of compost to dry slightly before watering again. Waterlogging not only damages the roots, but also affects the offsets – and therefore the whole sculpture.
In very mild areas roughly equivalent to climate zones 10 or 11, a spider plant will also be happy outdoors during the warmer months. However, once temperatures fall below around 13 degrees Celsius, it should be brought back indoors so that the leaves and shoots are not damaged.
Mistakes that can quickly spoil the sculpture – and how to avoid them
When creativity takes over, it can be tempting to interfere too heavily. Three common pitfalls occur time and again:
- Bending shoots too sharply: Creases damage the tissue, causing those areas to dry out. Shape the shoots gradually over several days instead.
- Fastenings that are too tight: Tight wire loops constrict the shoots. Soft ties or clips that leave some room are far more suitable.
- Removing too many offsets: Cutting away every small rosette deprives the shape of its fullness. Reduce them only where they genuinely get in the way.
It works well to check the plant briefly on a regular basis and correct small details straight away: loosen a loop, tie in a new shoot or remove a dried-out offset. This allows the sculpture to develop organically rather than becoming rigid.
Why the spider plant is so well suited to shaping
The spider plant is among the hardiest houseplants of all. It tolerates care mistakes, responds quickly with fresh growth and readily produces new offsets. Many varieties are also non-toxic to pets, making them particularly appealing for homes with cats or dogs.
Its speed is another advantage: once shoots are trained into shape, a noticeable result can be seen after only a few weeks. That encourages you to try further variations. In time, you can even build a type of collection featuring different sculptures, all made from the same plant species but each styled differently.
For people who would like to try something creative with plants but do not feel confident tackling complex bonsai techniques or delicate exotic varieties, the spider plant is therefore an ideal starting point. One pot, some wire, a cane and a little patience are all it takes to turn a plant that sits at the edge of the furniture into a genuine green centrepiece.

Comments
No comments yet. Be the first to comment!
Leave a Comment