
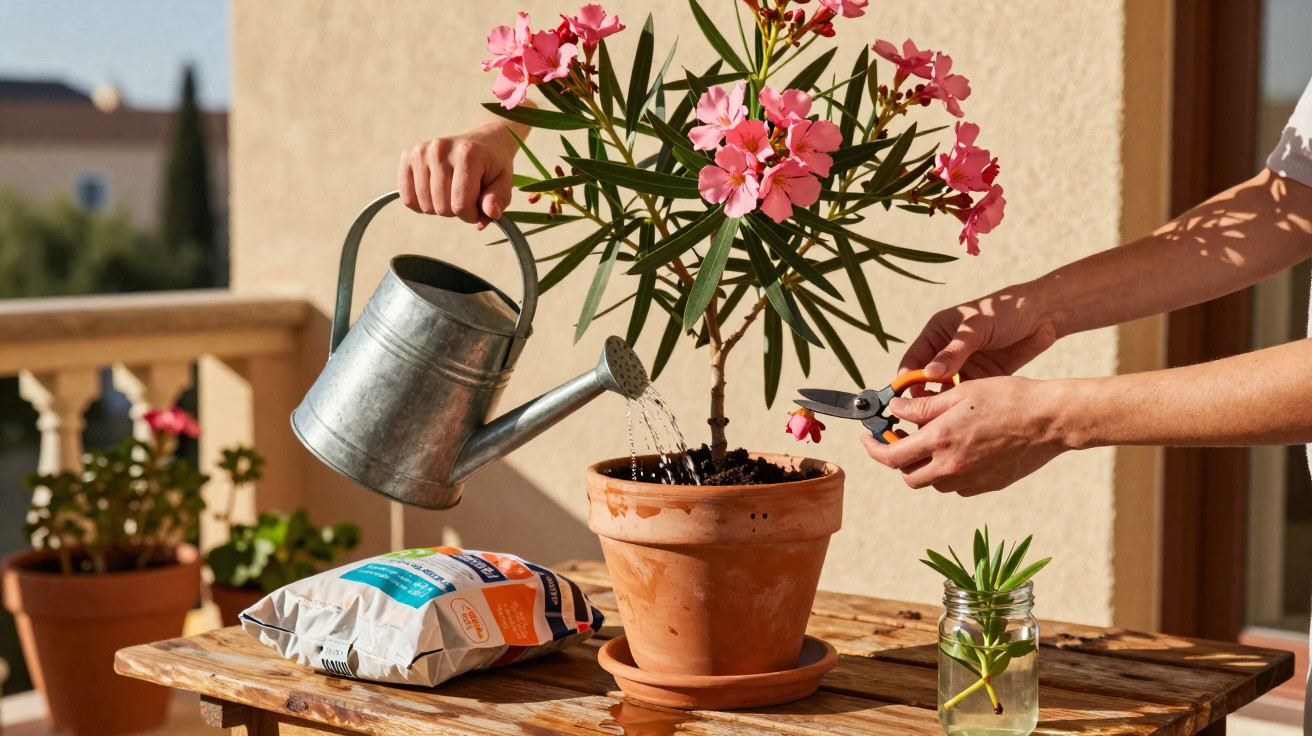
Many amateur gardeners buy this evergreen shrub expecting an outright explosion of flowers. Yet in reality it may produce only a few isolated clusters, looking tired and lacklustre. A straightforward basic rule, plus several well-chosen measures, can transform this situation – and make a container on the balcony or patio suddenly feel Mediterranean.
Where Oleander comes from – and why this matters for its care
Oleander (Nerium oleander) originates in the Mediterranean region and parts of South Asia. In its native habitats, it grows wild beside rivers and in dry stream beds. There it copes with conditions that would harm many garden plants: blazing sunshine, poor soil, spells of drought, followed by heavy surges of water.
This background explains why the shrub can often remain stunted here. It is frequently given too little light, watered too evenly and, in some cases, planted in soil that creates waterlogging rather than evoking a holiday climate.
“Treat Oleander like a delicate houseplant and you will hold back its flowers. Treat it like a tough Mediterranean plant and it will reward you.”
That is the basis of the key care principle: position, watering and nutrients should resemble its natural conditions as closely as possible. Do that, and this flowering machine can get going.
The golden rule: sun, generous watering and effective drainage
For abundant Oleander flowers in summer, one factor above all matters: plenty of light. Without the power of sunshine, there will be no wealth of blooms – it really is that simple. Watering, drainage and feeding must also work together.
The best position: more sun means more flowers
Oleander needs a position in full sun. Partial shade is seldom enough to achieve an impressive display of flowers.
- at least 6 hours of direct sunshine each day
- ideally beside a warm, sheltered house wall or on a south-facing balcony
- avoid exposed corners where wind constantly blows through
Anyone who places the plant at the back of the garden simply because there is space there should not be surprised by sparse flowering.
Watering: soak it properly rather than sprinkling little and often
Oleander tolerates drought, but only once it is well established and has sufficient water reserves. For plants in containers, one point is clear: in summer, it drinks an enormous amount.
Practical rules of thumb:
- water generously every day during very hot summer weather, sometimes even twice daily
- always soak the entire root ball rather than merely dampening the surface
- water much less frequently in winter; the compost should remain only slightly moist
Important: water is essential, but waterlogging is not. The roots are sensitive if they sit in water for prolonged periods.
Drainage: a healthy Oleander shrub needs water to escape
In a container, use both free-draining compost and a layer of coarse material at the base.
- place a layer of expanded clay, gravel or broken terracotta pieces in the bottom of the pot
- use a loose blend of potting compost and a little sand above it
- keep the pot’s drainage holes clear and do not leave the saucer permanently full of water
In the ground, the soil should not be overly heavy. In very clay-rich areas, incorporating sand and fine gravel is worthwhile so rainwater can drain away more readily.
Feeding like it is on holiday: geranium fertiliser as a useful tip
Oleander enjoys nutrients, particularly during its main growing period. Many gardeners choose specialist fertilisers, but these are not strictly necessary.
“One tried-and-tested trick is to add liquid geranium fertiliser to the watering can – use a moderate dose and apply it regularly.”
Keep the following in mind:
- feed every 1–2 weeks from April to August
- use a slightly lower dose rather than too much
- never feed a dry root ball; moisten it lightly first
Geranium fertiliser is designed for profusely flowering balcony plants. Oleander benefits from this because it too is intended to become similarly “free-flowering”. Do not overdo it, however, or it will produce only long, soft shoots and become more vulnerable.
Pruning Oleander: creating a dense crown and encouraging new flowers
Leaving Oleander entirely unpruned can result in long, woody shoots with few flowers. Carefully targeted pruning keeps the plant in shape and stimulates the development of new flower buds.
When to carry out the main prune
Late winter or very early spring is the ideal time, before the shrub starts growing in earnest. Its structure is then easy to see, making it possible to remove dead or particularly weak growth.
- cut out frost-damaged, brown or soft shoots completely
- shorten excessively long shoots slightly to make the crown more compact
- remove crossing branches so light can reach the centre
Avoid drastic summer pruning; at this stage, limit cutting to more “cosmetic” tidying.
Remove faded flowers – or leave them in place deliberately?
Many gardeners snip off spent flower clusters. This may encourage fresh blooms if only the flower base is removed and you do not cut deeply into woody growth. It is also the right approach for anyone wishing to prevent seed pods from forming.
Important: wear gloves. Every part of Oleander is poisonous, and its sap can irritate the skin.
Pests and diseases: what Oleander enthusiasts should watch for
A weakened shrub quickly becomes a magnet for pests. Aphids in particular enjoy settling on young shoots and flower buds.
“Regular checks make it possible to stop pests at an early stage – allowing flowering to continue undisturbed.”
Common issues include:
- Aphids: sticky deposits and misshapen young leaves
- Scale insects and mealybugs: small hard or waxy spots on shoots and the undersides of leaves
- Fungal infection where compost remains constantly wet, especially in winter quarters
A strong jet of water or mild soap solutions can help with aphids. If an infestation is severe, approved plant-protection products may be necessary. In winter quarters, Oleander plants should be kept somewhat drier to help prevent fungal diseases.
Propagating Oleander: how to succeed with the cutting experiment
Once you have a magnificently flowering shrub, you will usually want more of them. Fortunately, Oleander can be propagated relatively easily from cuttings.
Step-by-step guide to cuttings
- During summer, cut 15-centimetre lengths from healthy, non-flowering shoots.
- Remove the lower leaves, leaving only a few at the top.
- Dip the cut end in rooting powder (optional, but helpful).
- Insert the cuttings into a mixture of sand and seed compost.
- Moisten the compost lightly and place the containers somewhere bright but out of full sun.
Warm, gently humid conditions are important. A transparent lid or loosely placed sheet of plastic can help retain humidity. Roots will form after several weeks, and after around two months the young plants are strong enough to move into ordinary compost.
What many people underestimate: winter, safety and changing position
Oleander has only limited frost tolerance. In mild areas it can survive brief cold spells outdoors, but across many parts of the UK it needs protected winter quarters when frost is expected.
- ideal winter temperature: 5–10°C, bright and frost-free
- reduce watering substantially, without allowing it to dry out completely
- in early spring, gradually reacclimatise it to full sun to prevent leaf scorch
Its toxicity is another important consideration: the leaves, flowers and wood contain poisonous substances. Children and pets must not chew the plant. Prunings do not belong on the compost heap; dispose of them with general waste instead.
If Oleander still will not flower: everyday mistakes to check
If flowers still fail to appear after you have improved the position and care routine, it is worth checking several common causes:
- a pot that is too small: the roots no longer have room, which affects nutrient uptake
- winter quarters that are too dark: this leads to a weak start in spring
- severe pruning into areas containing flower buds shortly before the season
- stopping fertiliser halfway through summer even though the plant is in full bloom
Often, simply repotting decisively into a larger container, combined with more sunshine and a regular feeding schedule, is enough to deliver the long-awaited rush of flowers the following summer.
Anyone who remembers the golden rule – “as much sun as possible, generous watering with good drainage, and regular nutrients” – can turn a sad-looking shrub into an impressive focal point. For a few months each year, the balcony can genuinely feel like a little Mediterranean promenade, without the need for a plane ticket.

Comments
No comments yet. Be the first to comment!
Leave a Comment