
Many amateur gardeners cut away every rose shoot tip that appears spent without hesitation. Yet these branches often retain enough vitality to grow into an entirely new plant. The key is a simple wire trick based on an age-old gardening principle – with no costly aids and no specialist equipment.
Why a “dead” rose branch is not necessarily beyond saving
A grey, thorny branch carrying hardly any leaves may look like an obvious candidate for pruning. In many cases, however, sap is still moving through the wood. As long as a shoot is not completely dried out or blackened, its internal systems are still functioning.
“As long as the wood is not bone-dry, the sap flow can be redirected – and that is exactly what the wire trick takes advantage of.”
Rather than simply removing the branch, the aim is to encourage it to produce roots of its own. The result is a new, self-sufficient rose bush that preserves the old variety and often sends out much stronger growth than the weakened parent plant.
This can be used, for example, to:
- save a severely damaged old rose bush
- propagate a treasured variety from Grandma’s garden
- rejuvenate historic roses in a border without having to buy new plants
What happens inside the shoot: transport tissues, hormones and a root cushion
To see why a piece of wire can have such an effect, it helps to look briefly at the inside of a rose shoot. Two important transport systems run through it:
- Xylem: carries water and minerals upwards from the roots
- Phloem: sits immediately below the bark and moves sugars and growth hormones downwards
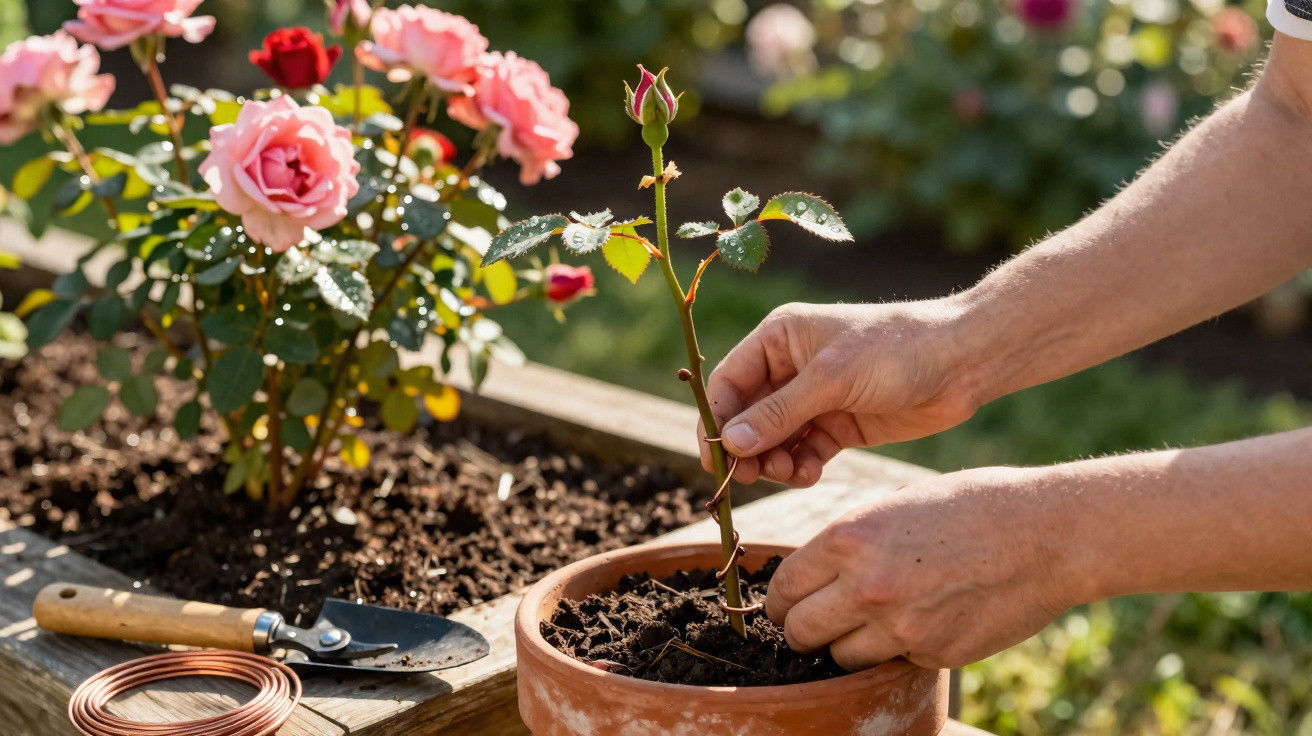
When soft wire around 1–2 mm thick is wrapped around the shoot and tightened, something interesting happens: the phloem is partly constricted, while the xylem continues to function. Water can therefore still travel upwards, but the return flow of sugars and hormones builds up at the narrowed point.
“This accumulation of sugars and auxins creates a swollen ridge above the wire – a root cushion from which new roots can develop.”
This root formation usually appears within three to six weeks. The best time is early spring, when sap is rising strongly, or late summer, when the plant remains active but is no longer growing at full speed.
Choosing the right rose shoot and applying the wire loop
Selecting a suitable branch is crucial for success. Ideally, choose:
- a shoot produced the previous year
- healthy wood with no cracks or black patches
- a branch roughly as thick as a pencil
Position the wire about 15 centimetres above the base of the branch. Tighten it until the bark is visibly indented, but do not cut completely through the shoot. It sounds delicate, but with a little care it works surprisingly well.
Soft steel wire is perfectly adequate, although copper wire works even better. It is kinder to the bark and also offers some protection against rot in the damp area around the small wound.
Minimal equipment needed for the rose wire trick
Most of the necessary materials can be found in an ordinary home workshop:
- flexible wire (1–2 mm), ideally copper wire
- flat-nose pliers and clean, sharp secateurs
- a pot or planting container with a saucer
- a mix of 50% loose compost and 50% coarse sand
- a clear plastic bottle or plant cover to create a mini greenhouse
- a label with the date, so that you can keep track of the timing
Two ways to grow a new rose bush: in the ground or in a pot
Option 1: Layering directly into garden soil
This approach is suitable when the parent bush is staying in the border and there is enough room around it.
- Once the wire has been fitted, wait three to six weeks until a visible swelling forms above the constriction.
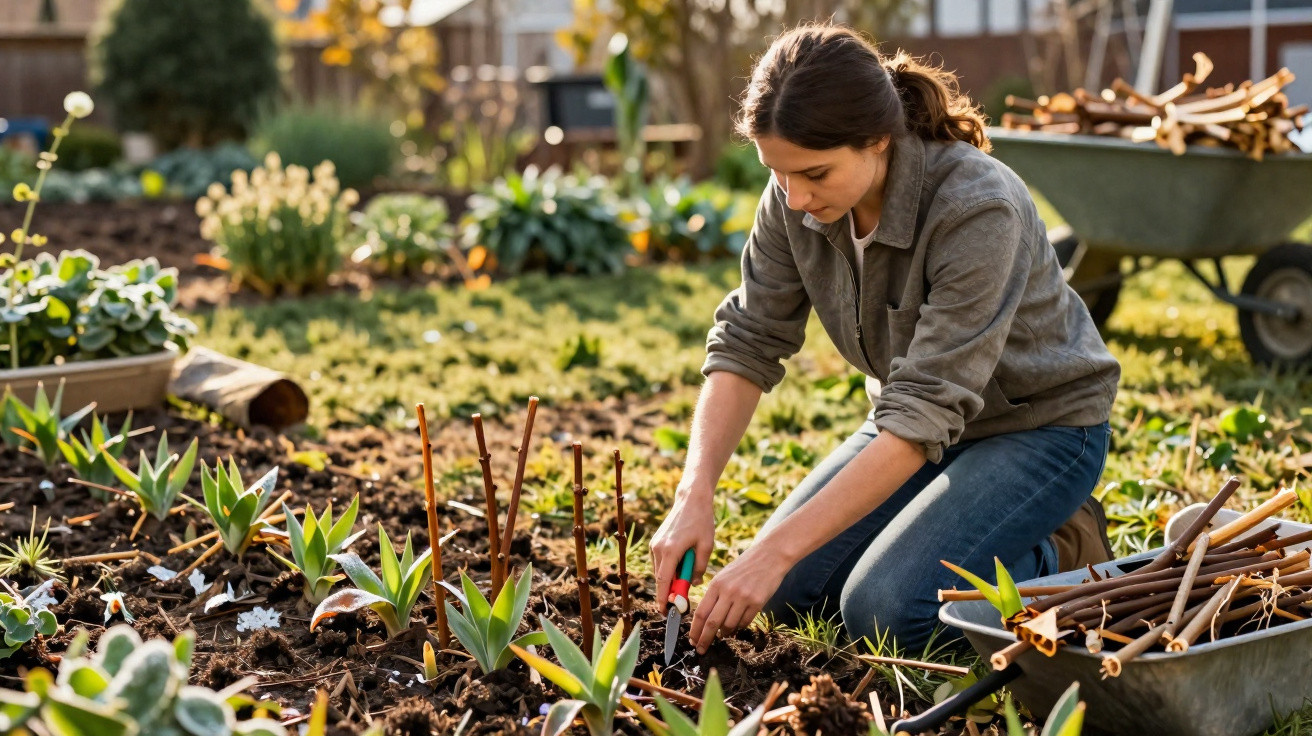
- Then dig a small trench around ten centimetres deep.
- Fill it with a mixture of sand and compost.
- Carefully bend the marked section of the rose shoot downwards, place it in the trench and secure it with U-shaped bent wire or a hook.
- Cover it again with soil and mark the spot.
The resulting layer remains attached to the parent plant throughout the winter. The following spring will reveal whether sufficient roots have formed. The new plant can then be separated with a clean cut between the parent bush and the root ball, before being planted in its permanent position.
Option 2: Rooting in a pot
Anyone without space for layering in a border, or who prefers a more controlled approach, can use the pot method.
- Once the root swelling has formed, cut the branch off just below the wire.
- Turn the resulting piece into a hardwood cutting around 15 to 20 centimetres long.
- Insert two thirds of the shoot into the prepared sand-and-compost mix in the pot.
- Lightly moisten the growing medium and place a clear bottle with its base removed, or a cover, over it.
- Put the pot in a bright location away from full sun, and keep the compost evenly but lightly moist.
“Fresh shoots or noticeable resistance when the shoot is gently pulled show that the rose has formed roots and is ready for the garden border.”
When to separate and plant out the new rose
With a layer rooted in garden soil, patience pays off. Do not cut the connection between the parent plant and the new root ball until a dense mass of roots has developed in spring. Plant the young rose in loosened, free-draining soil, ideally adding a little compost to the planting hole. A sturdy stake will protect it from wind damage.
The potted method requires a little more hands-on attention. First, remove the cover gradually so the young plant can adapt to drier air. Water sparingly: the compost should remain fresh but never waterlogged. Plant out during a frost-free period, either in spring or early autumn.
How reliable is the method, and what are its limits?
Experienced gardeners report surprisingly high success rates with this technique on old, ungrafted roses. In many cases, about nine out of ten treated shoots take root, whereas conventional cuttings fail far more often with difficult varieties.
The wire trick is not entirely risk-free, however. Potential problems include:
- constricting the shoot too tightly, causing it to die completely
- permanently wet growing medium, which encourages rot at the wounded area
- choosing the wrong time, when the plant is under stress or suffering from drought
- shoots from very weakly grafted or diseased roses that have few reserves
Why copper wire can be especially useful
Copper has a particular reputation in the garden because, in small quantities, it can inhibit fungal growth. Using the wire on an already slightly wounded area provides a small advantage: moisture and fungal spores find it harder to attack the bark. Even so, it remains important not to leave the area constantly wet.
For many amateur gardeners, a branch originally destined for the pruning pile can therefore become a valuable replacement plant – for instance, when an old favourite rose bush has been badly damaged by frost, fungal disease or browsing wildlife. Once someone has successfully rooted such a “rescue branch”, they often use the technique deliberately to propagate rare varieties in their own garden.
Practical additions for long-term healthy, free-flowering roses
The wire trick does not replace good care for the new rose bush. Once established, young roses need:
- a sunny to partially shaded position with good air movement
- loose, humus-rich soil that retains water without becoming waterlogged
- moderate pruning in the first few years, so that a strong framework can develop
- targeted nutrients in spring, such as an organic rose fertiliser
The method can later also be used on other ornamental shrubs, including currants, climbing hydrangeas and some clematis varieties. It is particularly worth trying where a branch is growing in an unhelpful direction or is in the way: a wire trick may give it a useful purpose rather than simply cutting it off.


Comments
No comments yet. Be the first to comment!
Leave a Comment