
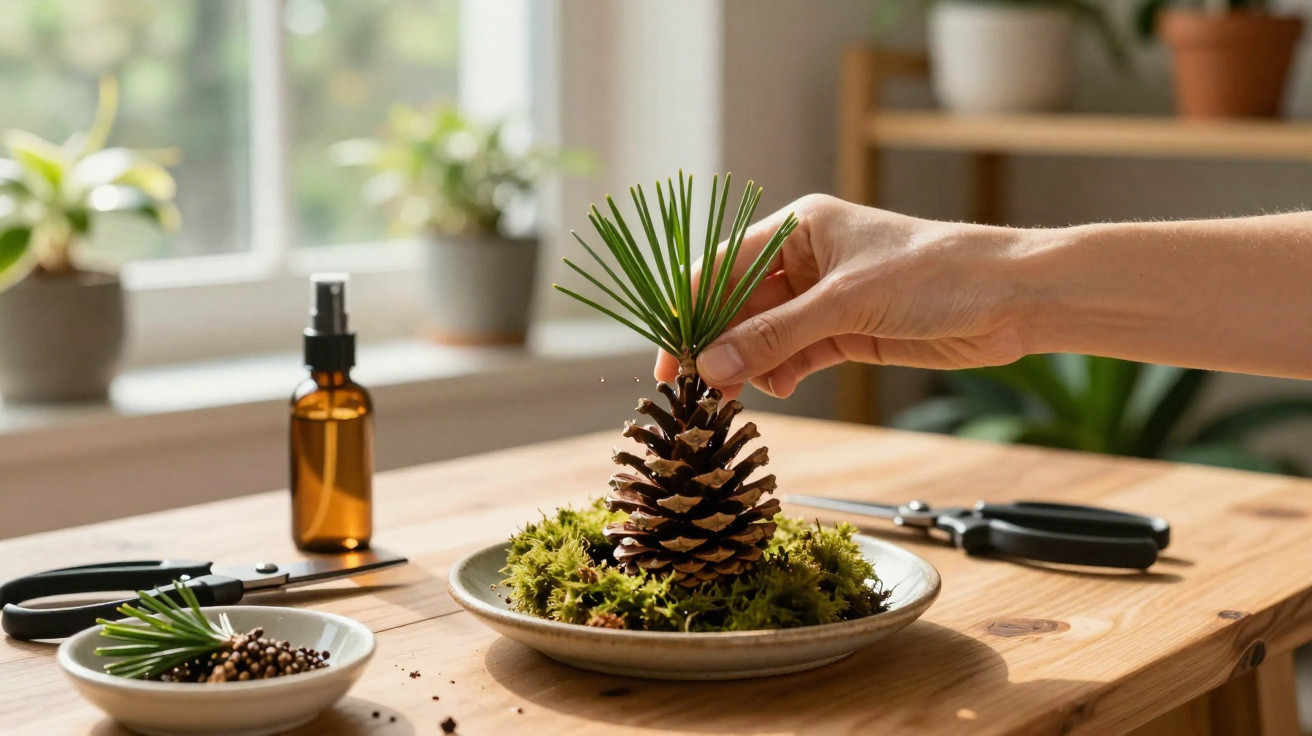
A modest object from the forest floor is now becoming an unexpected focal point.
Increasing numbers of plant enthusiasts are replacing assorted jars and foggy glasses with an easy, virtually free solution: a woodland find collected during a walk, which transforms cuttings from visual clutter into a design statement.
A woodland find becomes a plant hack
Anyone who propagates houseplants will recognise the sight: an assortment of mugs, jam jars and bottles lining the windowsill, each containing a promising stem. Practical, certainly, but rarely attractive.
The idea is to view an ordinary pine cone on the forest floor as something other than autumnal decoration. It is a small feat of natural plant engineering that responds to moisture, and this movement can be used to keep cuttings standing neatly, like a tiny bouquet.
A dry pine cone opens its scales wide; once soaked, it tightens them, gripping anything gently trapped in between.
Conifers developed this straightforward mechanical response to release and safeguard their seeds, and it works without power, motors or intervention. In an indoor garden, it effectively functions as a natural clamp.
Why a pine cone works so well as a propagation stand
The scales of a cone contain layers of plant tissue that expand at differing rates when they become wet. This produces a hinge-like action: dry conditions open the scales, while moisture causes them to fold inwards.
Place cuttings between the scales while the cone is dry and completely open, then position it in a bowl of water. As the cone takes up water over the next few hours, its scales draw together and lightly secure the stems, keeping them upright and gathered together.
A pine cone propagation stand has several benefits over glasses or test tubes:
- it holds multiple cuttings in one small base
- its low, broad shape makes it stable on a table or sill
- it resembles a decorative feature rather than gardening kit
- it is almost free when you forage the cone yourself
On a shelf, it appears more like a handmade centrepiece than a propagation arrangement, making it ideal for those with limited room or a dislike of untidy corners.
What you need to make a pine cone plant display
The required materials are intentionally uncomplicated, and most can already be found at home or in the garden.
Basic kit
- one large, clean, fully opened pine cone
- a watertight bowl, cup or saucer deep enough for a shallow pool
- small stones, clay pebbles or shells to weigh the cone down
- a little moss or damp sphagnum (optional, for aesthetics and humidity)
- sharp secateurs or a clean knife
- 4 to 8 stem cuttings, around 15 cm long
Select cones with no mould, insect holes or tacky resin. A wider cone makes it easier to insert stems without breaking the scales.
Best plants for this method
This approach is particularly suitable for plants that root easily in water and have supple stems with obvious nodes. Dependable options include:
- pothos and scindapsus
- philodendron varieties
- monstera adansonii
- tradescantia, often called “wandering dude” or “inch plant”
- string of hearts (Ceropegia woodii)
- peperomia, especially watermelon types
- soft-stemmed herbs such as mint
These species develop roots from their nodes, which are the slightly raised sections along a stem. When a node is submerged, fresh roots commonly emerge within days or weeks, according to the temperature and available light.
Step-by-step: from forest cone to living centrepiece
1. Clean and prepare the cone
First, use an old toothbrush or soft paintbrush to remove dry needles, soil and insects. Next, immerse the cone in water with a splash of white vinegar or diluted household alcohol. This brief soak helps to minimise fungal spores.
Allow it to dry completely somewhere warm with good airflow. The scales will open again as the cone dries, making this the best time to insert the stems.
2. Take cuttings the right way
Prepare the cuttings while the cone is drying. With a sharp, clean blade, make each cut directly beneath a node. Each cutting should have 10–15 cm of stem. Strip foliage from its lower half so that no leaves will be submerged later.
Roots form best from bare nodes under water; leaves submerged in water tend to rot and foul the container.
Several cuttings can be taken from one long trailing stem, provided every piece includes at least one or two nodes.
3. Assemble the display
Once the pine cone has opened fully, carefully slot each stem between a pair of scales. Arrange them evenly around the cone to create a balanced appearance from every side.
Place the filled cone in the bowl, then surround its base with stones or shells to prevent it from floating. Add water until it covers the lower stem sections, without submerging the entire cone. Only the area surrounding the bases of the stems needs to be in water.
Leave the arrangement undisturbed for several hours. As it absorbs water, the cone closes its scales around the cuttings and keeps them vertical. The finished piece then works as one robust, bouquet-like object.
Care and maintenance of your pine cone stand
Keep the display in bright but indirect light. Intense midday sunshine through a window can warm the water and put pressure on developing roots. A north- or east-facing window is generally a suitable position.
Refill the water as its level falls, replacing it whenever it becomes cloudy or smells unpleasant. Clean water helps curb bacterial growth and supports healthy new roots.
When the roots are a few centimetres long, transfer the cuttings to compost. Choose a light potting mix and maintain even moisture during the first couple of weeks. The plant is adjusting from water to soil, so its young roots require time to acclimatise.
When shifting water‑rooted plants into compost, think of it as rehab for the roots: gentle conditions, steady moisture, no sudden droughts.
Common questions and small risks to watch
Rot is a frequent concern. If only the base remains in water and the water is changed regularly, a cone will usually last for months. Should it start to soften or become darker, dry it thoroughly for several days before using it again.
Pests are another consideration. Pine cones gathered outside may contain tiny insects, but a careful rinse followed by a short soak in diluted vinegar lowers the risk. Those sensitive to mould should not use cones that retain a musty smell after cleaning.
A tall cutting paired with a very small cone can also create a slight risk of tipping. If this happens, use a weightier bowl, add additional stones, or place two cones together in one container to improve balance.
Beyond aesthetics: why this method appeals to plant people
This form of plant propagation offers more than visual appeal: it alters how the process feels. Rather than concealing jars behind curtains, you can display the experiment in the living room as an object that changes over time.
It can be particularly engaging for children as well. They can observe the pine cone gradually closing, see roots growing through clear water, and explore simple plant biology without relying on a textbook. In small flats, it is also an uncomplicated way to grow a collection before investing in new pots.
| Aspect | Pine cone stand | Standard glass of water |
|---|---|---|
| Stability | Low, wide base, less easy to knock | Tips over more easily |
| Aesthetics | Natural, sculptural object | Looks functional, often mismatched |
| Capacity | Several stems in one compact unit | Often one or two stems per glass |
| Cost | Essentially free if foraged | Requires suitable containers |
Ideas to extend the project further
After mastering a single pine cone, you can create an entire “forest” of propagators in different heights. A tall vase can conceal the bowl and stones, so that only the cone and leaves are visible, giving the impression of a plant growing directly from water.
For seasonal decoration, a winter version could feature conifer sprigs with ivy cuttings. In summer, mint and basil cuttings can turn the stand into an edible display from which you can harvest. Pairing the method with grow lights or a basic heat mat can encourage faster rooting in more demanding species.
When used with care, this small woodland treasure becomes more than a craft project. It links outdoor walks with indoor gardening, demonstrating how a single fallen pine cone can discreetly organise, support and enhance an entire propagation routine.
Comments
No comments yet. Be the first to comment!
Leave a Comment