
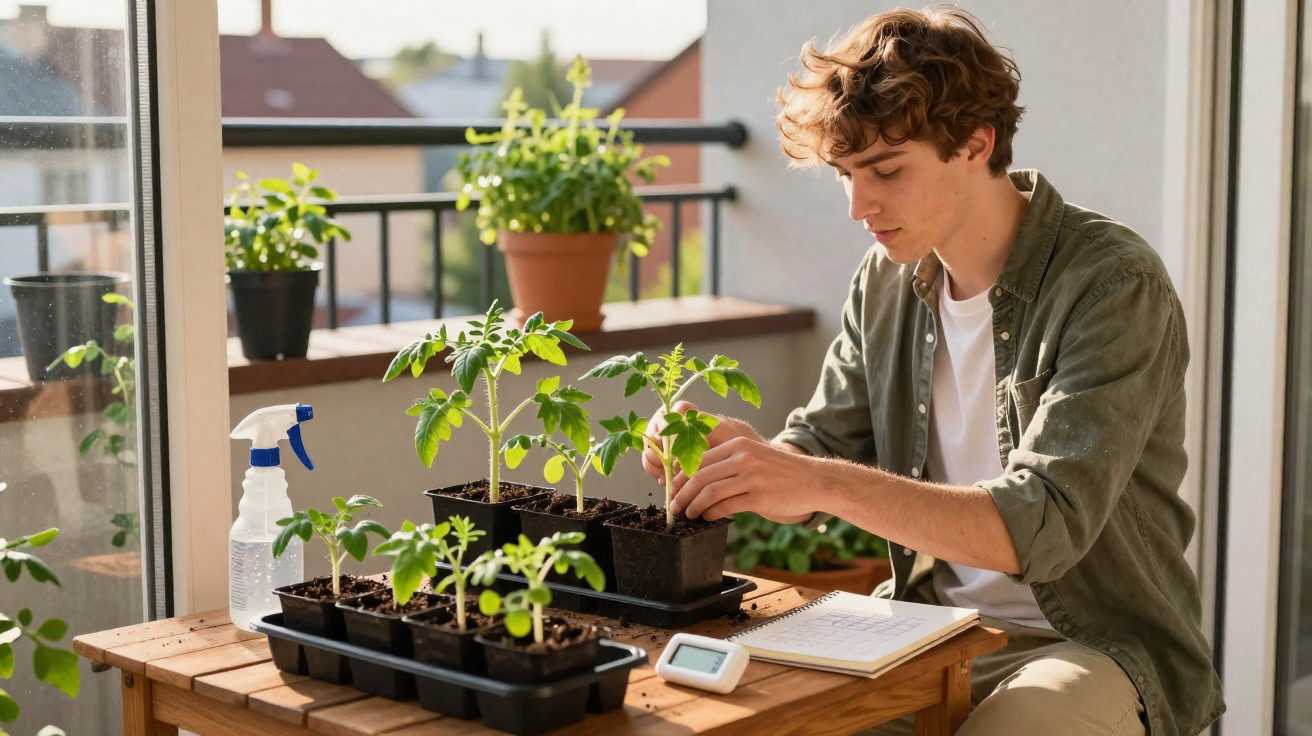
The calendar says “planting time”, the sun is shining and the young plants look strong – so it is tempting to put them straight into the garden. Yet this is exactly where the same mistake is made in countless beds every year, one that can ruin an entire summer of tomato-growing hopes. The variety, seeds and often even the planting date are not to blame; rather, it is a skipped intermediate stage that makes the difference between a bumper crop and stunted plants.
The common spring mistake beginners make with tomatoes
Tomatoes, peppers and aubergines enjoy a luxurious life on the windowsill, in a conservatory or in a heated greenhouse. Temperatures are generally around 20°C, there is no wind, the light is filtered, and the air is often pleasantly dry. Their leaves remain soft, the protective surface layer is still thin and their tissue has barely toughened up.
That is precisely why these plants are so sensitive when they are moved outdoors overnight without any preparation. Outside, they face entirely different light, real UV radiation, fluctuating temperatures and wind. A first warm spring day may feel wonderful to us, but for a pampered tomato plant it is a shock.
The consequences usually become visible only after one or two days:
- Leaves turn pale, almost whitish – a classic sign of sun scorch.
- Stems appear soft, while the plant droops limply at midday.
- Growth stops or slows noticeably.
- In extreme cases, individual plants die completely.
“The problem is rarely the ‘wrong date’, but the missing transition between the sheltered indoors and the open air.”
Typical warmth-loving crops in the vegetable patch are particularly affected: tomatoes, peppers, chillies, aubergines and basil. They are nearly always raised indoors and spend weeks in warmth. Direct-sown crops such as radishes and carrots do not have this luxury – they germinate in the bed itself and adapt to changing conditions from the outset.
The overlooked stage: harden off tomatoes instead of shocking them
Gardeners use the term “hardening off” when young plants are gradually accustomed to life outdoors. The principle is simple but effective: before moving permanently into the bed, plants need to adjust to the light, wind and temperature changes they will encounter.
The right time begins when daytime highs are consistently at least 15°C and no night frosts are forecast. Then the plants can follow a short training programme lasting roughly seven to ten days.
Nine-day plan for hardening off tomato plants
Here is one possible schedule, which also works well on a balcony or patio:
- Days 1–3: Put plants outside for 1 to 2 hours each day, in shade and sheltered from wind. A spot under a table or beside a house wall works well.
- Days 4–6: Leave them outdoors for 4 to 5 hours. Give them a little morning sun, then return them to partial shade later on.
- Days 7–9: Place them for 6 to 8 hours in their eventual position in the garden or on the balcony. If temperatures are cool overnight, continue bringing them indoors or into a sheltered area.
A great deal happens within the plant during this period: leaves develop a thicker protective layer, cells become more stable, and the tiny stomata in the leaves become better at regulating water. Put simply, the tomato learns how to cope outdoors.
“Anyone who hardens off tomatoes carefully avoids the dreaded ‘tomato shock’ and often gains a two- to three-week head start in growth.”
Planting tomatoes correctly: getting them safely into the soil
Once hardening off has been successful, the second crucial stage follows: planting into the border, raised bed or a large container. Here too, small details determine whether plants establish well or struggle for weeks.
A proven approach for tomatoes is:
- Water the root balls thoroughly before planting, until they are fully soaked.
- Dig a planting hole around 20 centimetres deep, or slightly deeper depending on the size of the plant.
- Plant the tomato so that part of the stem is below the soil; around 10 centimetres is ideal.
- Remove leaves from the section of stem being buried, so that nothing rots.
- Put in a cane or another support as you plant, preventing the plant from wobbling about.
- Finally, mulch generously around the root area with straw, dried grass clippings or leaves.
The buried part of the stem produces extra roots, making the plant stronger and more stable. Mulch acts as natural insulation: it keeps the soil evenly moist and reduces major temperature swings around the roots.
Moisture and disease: keeping tomatoes healthy after planting
Tomatoes love warmth and light, but they dislike constantly wet leaves and stale air. Standing moisture on foliage combined with sudden temperature shifts creates ideal conditions for fungal diseases. Downy mildew, powdery mildew, grey mould and a range of leaf spot diseases can soon appear in the bed.
A few straightforward rules can reduce the risk considerably:
- Water tomatoes at root level wherever possible, rather than pouring water over the leaves.
- Ideally, water in the morning or evening, when the sun is not at its strongest.
- Leave adequate space between plants so air can circulate.
- Remove or tie up foliage that lies permanently on the ground.
Many home gardeners also swear by a milk-and-water mixture as a spray. A solution containing around 10 to 20 per cent ordinary cow’s milk, with the rest water, lightly sprayed over the foliage, is regarded as a gentle plant tonic. Some observations suggest it can slow fungal infection and make the feared blossom end rot less common.
“Milk does not replace a fungicide, but for many gardeners it acts rather like a ‘light vaccination’ and supports the plants’ resilience.”
How to recognise well-hardened tomato plants
If you are unsure whether your own plants are ready for the bed, look for a few signs. Well-prepared tomatoes have:
- Strong, fairly dark green leaves rather than very pale, soft foliage.
- Sturdy stems that do not bend over in the slightest breeze.
- Few or no whitish marks caused by sun scorch.
- Compact growth, rather than excessively tall and leggy plants.
If plants appear severely stressed after their first trial day outside, it is worth stepping back and extending the hardening-off period. One extra week of patience can often save the entire season.
Why tomatoes are more sensitive than many other vegetables
Tomatoes originally come from warmer regions and cope less well with changeable April weather than crops such as cabbage, lettuce or root vegetables. They are genuine heat lovers. At the same time, they are almost always raised indoors and pampered in home gardens – the ideal breeding ground for later stress reactions.
Radishes, carrots and spinach, by contrast, germinate directly in the bed and must cope with cold nights, wind and strong sunlight from the beginning. They adapt automatically, whereas tomatoes first have to learn, gradually and with effort, to live with these conditions.
Keeping this in mind makes it easier to treat tomatoes like sensitive young animals that need a gentle introduction to the “outside world”, rather than releasing them abruptly into it.
Practical tomato tips for balconies, patios and allotments
Hardening off is not only useful in a large vegetable garden. Anyone growing just a few container tomatoes on a balcony also benefits from this intermediate step. Useful tricks include:
- Use carrying crates or trays to take several pots outside and bring them back in at once.
- For the first few days, position plants close to a house wall, where it is usually warmer and less windy.
- If a cold snap is forecast, use horticultural fleece or an old blanket for protection.
- Keep an eye on weather apps: an unexpected late frost can otherwise undo everything.
If you have a large number of plants, you can also make a temporary “outdoor greenhouse”. Use simple hoops made from wire or PVC pipe, cover them with plastic sheeting or horticultural fleece, open it during the day and close it at night. This lets tomatoes become accustomed to outdoor conditions gently, without being exposed immediately to wind and full sun.
Ultimately, success does not depend on one “perfect” planting day, but on preparation in the preceding weeks. By hardening off tomatoes step by step, planting them deeply, mulching well and watering wisely, you can get substantially more from every plant – while avoiding the frustration of white, scorched leaves when the first burst of spring sunshine arrives.
Comments
No comments yet. Be the first to comment!
Leave a Comment