
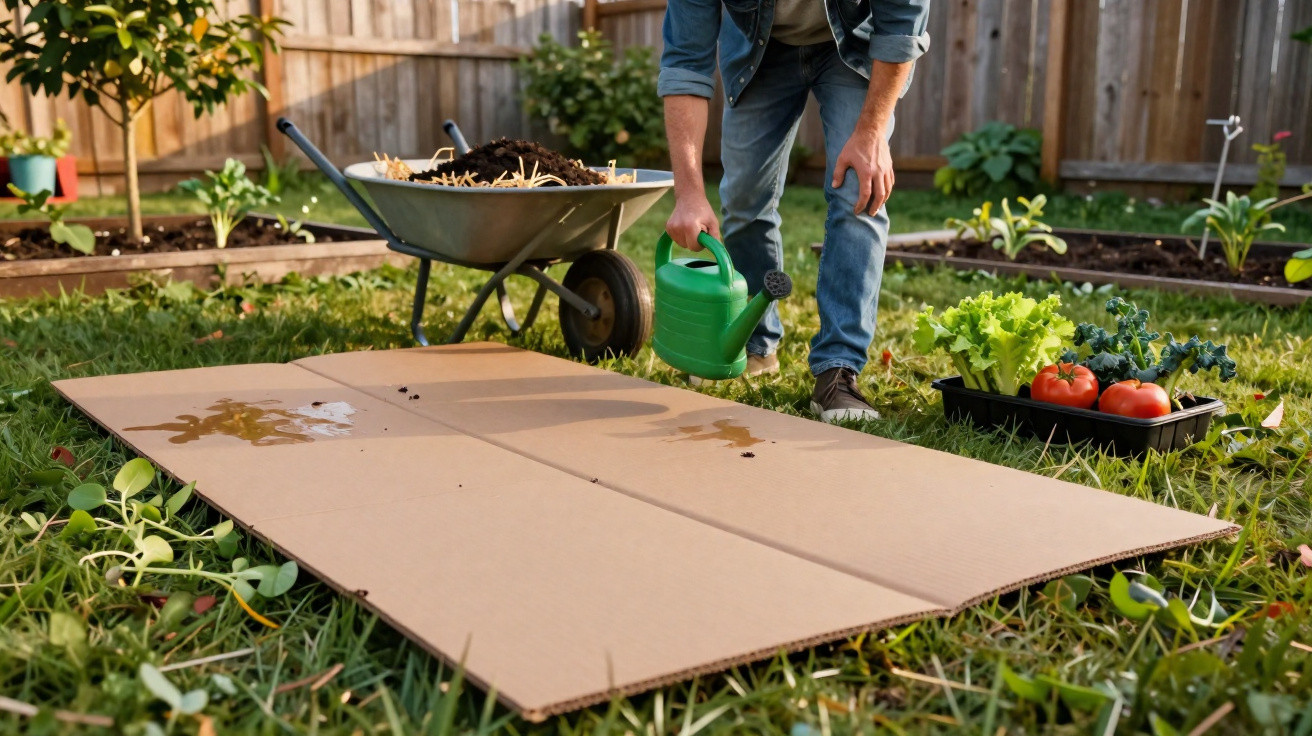
When the days grow brighter, many people feel the urge to get gardening: a new bed, fresh vegetables, ideally right outside the door. Then the spade goes into the ground, the back starts complaining – and enthusiasm fades faster than the first seedlings emerge. A straightforward technique from “lazy gardening” can turn an ordinary lawn into a productive bed within a few weeks. Its key material is brown cardboard, which most people would otherwise put in the bin.
How cardboard replaces the spade
The principle is almost disarmingly simple: rather than laboriously removing the turf, place several layers of cardboard straight onto closely mown grass. The cardboard acts as a light-proof cover. With no light reaching them, most grasses and weeds give up after a few weeks. At the same time, lively soil activity begins beneath the covering.
“The cardboard blocks out the light, feeds soil organisms and naturally turns hard lawn into loose garden soil.”
Once it becomes wet, the cardboard softens and settles into every uneven patch. Earthworms, woodlice and micro-organisms move upwards. They consume the grass remains and decomposing cardboard, create channels through the soil and work in organic matter. The result is airy, crumbly soil without a single session of heavy digging.
Horticultural trials indicate that a layer of cardboard can suppress almost all unwanted growth. Reductions of more than 99 per cent in weeds compared with the original area are possible – considerably more than chemical products often achieve. Meanwhile, the soil stays covered, full of life and rich in nutrients.
Which cardboard is genuinely suitable for the garden?
To prevent the bed from becoming a rubbish tip, choosing the right material matters. Only plain brown shipping cardboard without a coating is appropriate.
- Use only brown corrugated cardboard.
- Avoid coloured printing, glossy finishes and plastic films.
- Remove all tape, labels, plastic components and metal staples beforehand.
- Several thin layers are preferable to one extremely thick layer.
As a rule of thumb, use two to three layers of cardboard, totalling roughly half a centimetre in thickness. Mow the area underneath as short as possible first. This leaves the grass blades with fewer reserves to force their way through, while allowing the cardboard to sit more closely against the ground.
Step by step to a back-friendly vegetable bed
This method is particularly well suited to anyone with a sensitive back, limited time or simply little desire for strenuous garden work. The process is manageable.
1. Prepare the area
First, mark out the intended bed and cut the grass there as low as you can. Leave the roots and existing turf in place, as they will later provide an additional source of nutrients.
2. Lay the cardboard
Next, cover the whole area with pieces of cardboard, allowing a generous overlap of around 20 centimetres. This prevents gaps through which light could later reach shoots and grass blades. The more carefully this layer is laid, the less weeding will be needed later.
3. Water thoroughly
Soak the cardboard thoroughly until it is soft and lies flat across the ground. A garden hose or watering can will do the job. Any dry sections may otherwise lift up, reducing the method’s effectiveness.
4. Cover with a nutrient-rich layer
Add a layer of organic material on top of the soaked cardboard. Suitable options include:
- 5–10 centimetres of mature compost
- well-rotted farmyard manure
- or a thick layer of plant mulch, such as hay, leaves, chipped branches or dry grass clippings
This top layer shields the cardboard from direct sunlight, stops it drying out too rapidly and supplies nutrients for the first crops. It also keeps the soil protected, so there is no bare earth anywhere.
The right time to begin and when planting can start
Starting in late March or early April makes the most of the ideal period. The soil is gradually warming, moisture levels are still adequate and the growing season is ahead. Depending on the weather, the cardboard takes around three to six weeks to break down enough for planting.
A few signs show that the time has arrived:
- The cardboard can be pressed in or torn easily with a finger.
- The former grass beneath looks yellowish and weak.
- The compost or mulch layer remains moist inside and has a pleasant earthy smell.
By late April to mid-May at the latest, most areas are ready for their first plants. Then comes the enjoyable part: planting, watering and watching.
Which plants get off to a particularly good start in cardboard beds
On this type of area, sturdy young plants perform far better than delicate direct sowings. Anyone who does not want to wait for the cardboard to disappear completely should choose strong transplants.
Typical choices for starting a cardboard bed include:
- tomatoes
- courgettes and other squashes
- brassicas
- lettuces
- strawberries
- early potatoes
For each plant, make a small pocket in the compost layer, cut the cardboard open slightly and position the root ball so it has direct contact with the soil. The roots soon find their way into the loosened earth, which is threaded through with worm tunnels.
Gardeners generally sow sensitive crops such as carrots, parsnips or delicate leafy vegetables only once the cardboard has almost fully rotted down. Their tender seedlings can then push upwards without obstruction.
Benefits for your back, the soil and the environment
The cardboard method delivers advantages on several fronts. Its most obvious benefit is that there is no arduous digging, no laborious turf removal and very little sweat-inducing work. It can make areas usable in the first place, including ground that is heavily compacted or gardens tended by people with restricted mobility.
| Aspect | Benefit of the cardboard method |
|---|---|
| Physical effort | Hardly any heavy lifting; no spade work required |
| Soil structure | Worms loosen the soil and create a stable crumb structure |
| Weed pressure | Weeds are strongly suppressed by the lack of light |
| Nutrients | Cardboard and mulch break down into humus |
| Environmental impact | Less use of chemicals and a useful purpose for packaging waste |
Working this way encourages soil that remains covered and alive over the long term. Humus formation, improved water retention and more life below ground become noticeable after just one season. Many gardeners report that their beds continue to hold up surprisingly well, even after a dry summer.
Common mistakes and how to avoid them
Although the idea is simple, a few details determine whether it brings success or frustration. Cardboard that is too thin or laid with gaps lets light through, allowing the old turf to grow again. Glossy cardboard containing plastic films also has no place in a bed; it will not rot down and may leave residues in the soil.
Another potential problem is an insufficient top layer. Without enough compost or mulch, the cardboard dries out too quickly, becomes brittle and lifts at the edges. This creates openings for weeds. Applying five to ten centimetres of organic material from the outset and keeping an eye on the area during the first few days reduces this risk substantially.
How cardboard can be combined with other methods
A cardboard bed works well alongside other low-effort approaches in the home garden. For example, you can plant directly into a layer of chipped branches, straw or leaves placed over the cardboard. Combined with drip hoses or simple soaker hoses, this creates an almost maintenance-free system: infrequent hoeing, little watering and minimal bending.
The same approach can also be used in raised beds. A layer of cardboard at the base of a raised bed suppresses the old grass and decomposes over time. Add branches, leaves, half-rotted compost and finally planting soil above it. Vegetables then grow from the start in a loose, well-nourished environment.
For beginners, it is worth creating a smaller trial bed first. An area measuring two by two metres is enough to test the method. If everything works as planned, the system can easily be extended to further areas the following spring – entirely without exhausting sessions with a spade.
Comments
No comments yet. Be the first to comment!
Leave a Comment