
Brownish leaf tips, limp foliage and hardly any fresh shoots: by March, many spider plants look more like a dejected flatmate than a lush indoor-jungle star. Yet this is precisely when it is decided whether they will impress all summer with fresh, dense foliage. A few well-chosen spring jobs can bring a surprising amount out of Chlorophytum comosum – with no professional gardening skills required.
Why spring is such a crucial time for the spider plant
From March onwards, the spider plant begins to ramp up its metabolism again. Days become longer, temperatures rise and new leaves emerge. During this growing period, it copes with changes far better than it does in winter: repotting, moving position and pruning are all best done now.
“Treating your spider plant to a little spring check-up, much like a visit to the GP, rewards you with thick, healthy foliage in summer.”
Miss this window and the consequences often appear in the height of summer: dried-out compost, scorched leaves at a south-facing window and a pot completely filled with roots. At that point, it becomes a matter of limiting the damage rather than simply enjoying a green living room.
Spider plant profile: what makes it so resilient
| Botanical name | Chlorophytum comosum |
| Common names | Spider plant, ribbon plant |
| Size | Around 25–40 cm tall and up to 60 cm wide, with cascading leaves |
| Light requirements | Bright, indirect light; tolerates partial shade |
| Temperature | At least 10 °C; 18–24 °C indoors is ideal |
| Leaves | Evergreen, narrow strap-shaped leaves, green or green-and-white striped |
Its reputation for being “indestructible” is only partly true. The plant puts up with a lot, but it gives clear signs of stress: brown tips from unsuitable watering water, limp foliage from waterlogging or insufficient light, and scorched patches from direct midday sun.
Spring check: 6 jobs to restore your spider plant
Once a year, it is worth giving a spider plant a small maintenance session. It takes less time than expected and makes a major visual difference.
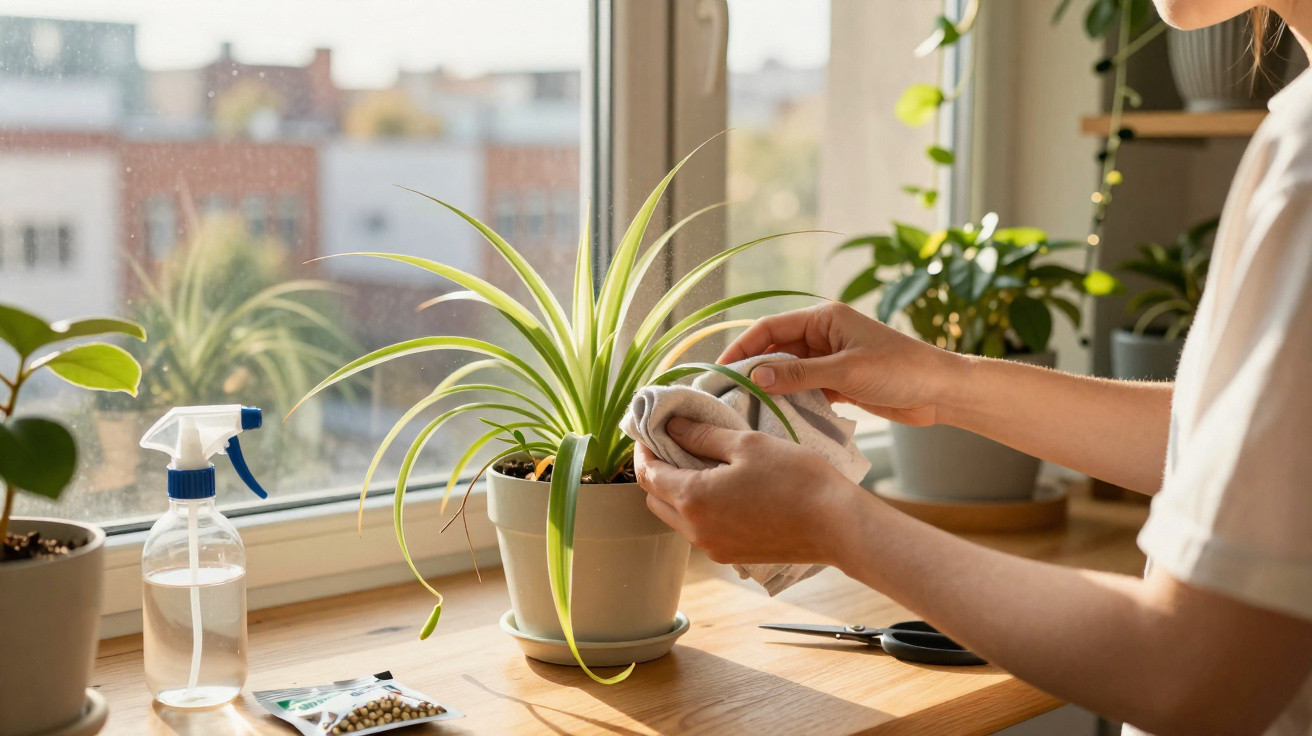
1. Remove dust from the leaves thoroughly
Dust slows photosynthesis and makes the plant appear dull. In spring, gently wipe every leaf once, ideally using a soft, lightly dampened cloth. Do not overlook the undersides of the leaves, as this is where dust and potential pests collect.
2. Cut away dry leaves and brown tips
Remove fully dried leaves right at their base. Trim brown tips back at a slight angle with clean scissors, leaving a little green behind. The plant will immediately look neater and can direct its energy into producing fresh leaves.
3. Adjust the watering routine
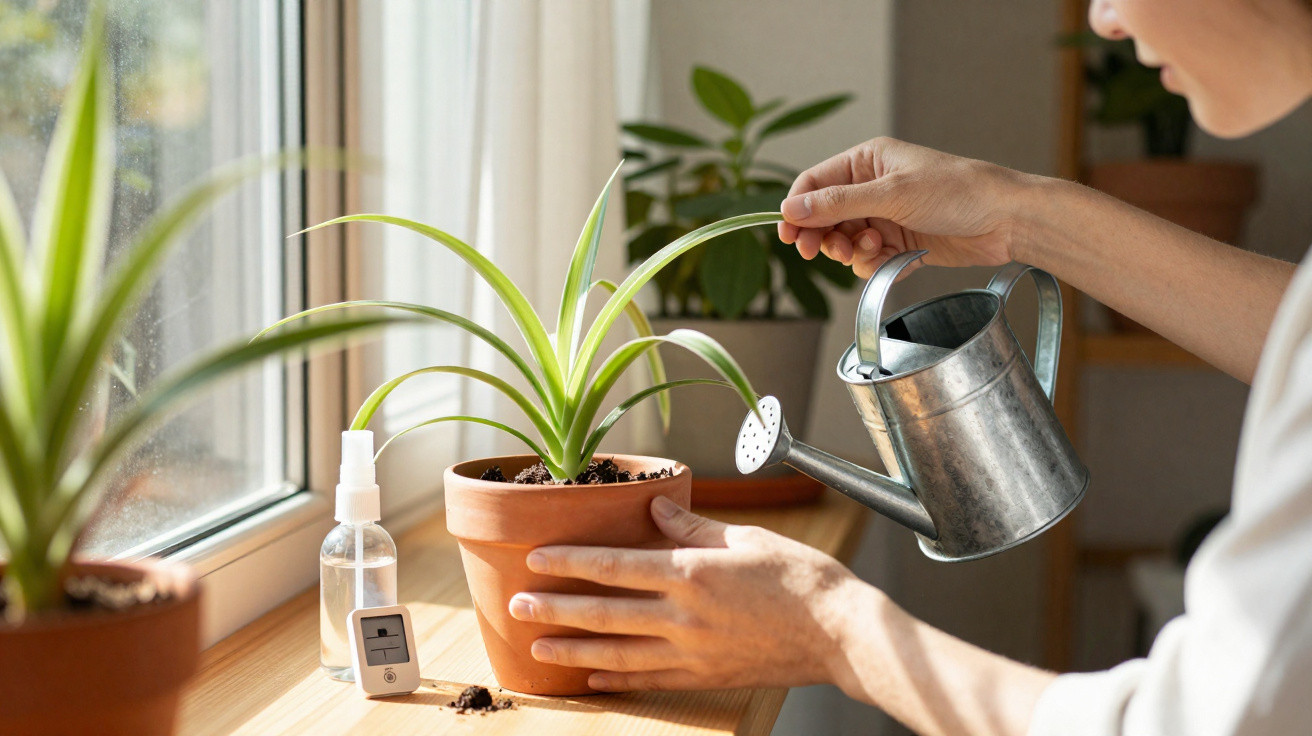
In spring, the spider plant is thirstier than it was in winter, but it does not like sitting in water.
- Water when the top layer of compost has dried out.
- Empty the cachepot or saucer after watering.
- Give smaller amounts of water more often rather than occasional “downpours”.
The finger test is useful here: if the top two centimetres of compost are dry, it is time to water again. If it still feels cool and damp, wait a little longer.
4. Use suitable water to prevent brown tips
Hard tap water can quickly cause brown leaf tips on spider plants. Where possible, use one of the following in spring and summer:
- Rainwater collected in a water butt
- Or tap water that has been left to stand for 24 hours
This reduces limescale and is kinder to the fine roots. In return, the plant develops fewer dry, damaged leaf ends.
5. Start feeding gently
After its winter rest, the nutrient supply in the compost is usually depleted. From March, the spider plant benefits from a mild nutrient boost:
- Use a liquid feed for foliage plants.
- Apply it only very diluted, preferably weaker than the bottle recommends.
- Once a month is entirely sufficient.
Too much fertiliser can leave salt deposits in the compost or burn the roots. It is better to begin gradually and respond to the plant’s growth.
6. Check for pests
Spring is when aphids, spider mites and scale insects often reappear. Inspect the following areas:
- Leaf undersides
- Leaf bases
- The base of the plant in the pot
White cottony patches, fine webbing or sticky areas point to unwelcome visitors. Acting early often means a thorough shower for the plant and a little soft soap solution are enough.
Position and light: preventing sun scorch indoors
What seemed perfect in January may become problematic in April. As the sun sits higher in the sky, a south-facing window can quickly turn into a miniature oven. Spider plants enjoy brightness, but not direct midday sunshine.
“A spot with bright but filtered light is ideal – for example, one to two metres from a window or behind a light curtain.”
Typical signs of sun scorch are pale patches that later turn brown and dry on the leaves. Move the pot a little further into the room or relocate it to an east- or west-facing window.
Repotting a spider plant in spring: more room for fresh leaves
If water runs straight through the pot when you water, or roots are visible beneath it, it is time to choose a larger container. Spring is the best season for this task.
How to repot step by step
- Loosen the pot carefully and lift the root ball out of the container.
- Examine the root mass: if it is extremely dense and firm, loosen it slightly.
- Choose a pot that is only a little larger and has a drainage hole.
- Mix houseplant compost with a little sand or perlite so it stays more open.
- Position the plant, fill around it with compost, press it down firmly and water thoroughly once.
Immediately after repotting, the spider plant should not be placed in strong sunshine. A bright, sheltered position helps it form new roots and soon resume vigorous growth.
Propagating young plants: making clever use of the “babies”
Long, arching shoots with small rosettes at their ends – known as plantlets – are typical of spider plants. In spring and early summer, many plants produce whole chains of them.
There are two ways to use them:
- Leave the plantlets attached to the parent plant for a lush, cascading look.
- Or pot them up to propagate new plants.
To create new plants, cut off the plantlets with a small section of stem, place them in small pots filled with loose compost and keep it slightly moist. Many quickly form roots of their own and then continue growing independently. This creates gifts for friends or extra plants for other rooms in no time.
Common problems and how to ease them in spring
Understanding the spider plant better makes it easier to spot warning signs early and take action before it suffers badly.
- Leaves are hanging limply: usually caused by too much or too little water. Check the compost moisture and adjust the amount you water.
- Lots of yellow leaves: often a lack of light or severely exhausted compost. Choose a brighter position and repot if necessary.
- Almost no new leaves: the pot may be too cramped or the plant may lack nutrients. Repot in spring and feed lightly.
- Hardly any plantlets: the position may be too dark or the compost constantly wet. Provide more light and extend the intervals between watering.
Health, air quality and urban jungle pairing ideas
The spider plant has been considered a classic among resilient houseplants for decades, and not only because it is easy to care for. Studies have shown that it can bind certain pollutants from indoor air. It also has another advantage: because it releases very little fragrance, many allergy sufferers tolerate it well.
Anyone creating a small “green corner” at home can pair the spider plant with other undemanding species such as snake plant, devil’s ivy or ZZ plant. All appreciate similar conditions and cope with a normal indoor climate over the long term.
It is also useful to clear up some naming confusion: shops often sell the spider plant as a ribbon plant, and sometimes even incorrectly as a “grass lily”. In almost every case, this means Chlorophytum comosum – depending on the variety, with plain green or white-striped leaves. Care requirements remain virtually identical for all varieties.
Taking time in spring for cleaning, trimming, checking the position, adding fresh compost and applying a little fertiliser lays the foundation for months of rich green cascades of leaves. This is exactly what many people want from a living-room plant: little effort, lasting fresh greenery and, ideally, plenty of small plantlets that make the success feel even more rewarding.
Comments
No comments yet. Be the first to comment!
Leave a Comment