
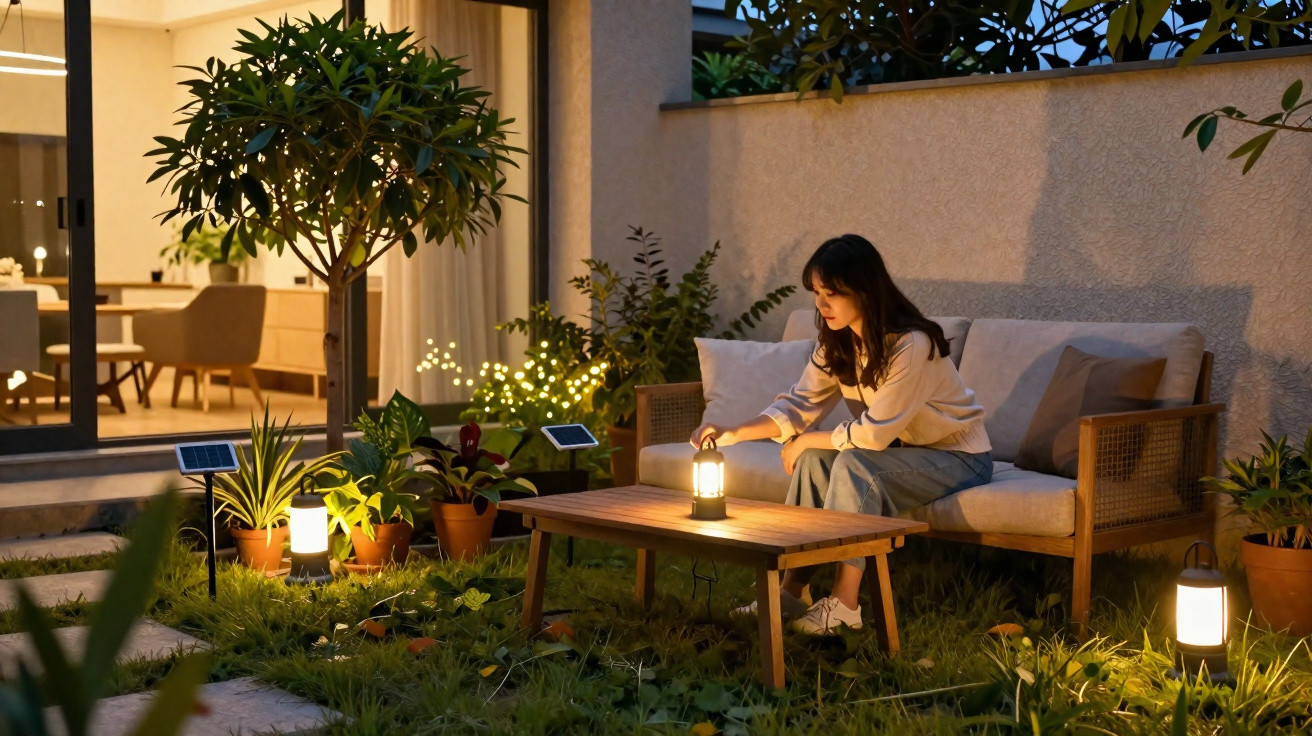
With a few simple adjustments, however, it can feel full of life again.
Many people believe a cosy, cinematic garden needs builders, wiring and a sizeable budget. In fact, several well-chosen lighting changes, completed in less than 30 minutes, can transform a chilly lawn into a warm winter view you genuinely want to admire.
Why your garden resembles a car park at night
A garden usually feels unwelcoming after dark not because it lacks lights, but because the lighting is the wrong kind and positioned badly.
At many properties, one strong floodlight above the garage or rear door does all the work. Its beam removes definition, bleaches texture and leaves every plant looking identical. When there is frost or snow, stark white light creates a cold blue glare, making the space feel like a warehouse rather than somewhere to unwind.
Outdoor comfort starts with tone, not power: gentle, warm light beats a blinding security beam almost every time.
Lighting designers refer to colour “temperature”, which is measured in Kelvins. For an inviting winter garden, choose warm tones from 2700K to 3000K. These shades resemble candlelight and firelight: bark appears more characterful, stone walls look gentler, and snow takes on a soft golden reflection instead of an icy blue one.
How to choose the right colour in 20 minutes
You do not need specialist equipment to correct the colour temperature. Most current LED bulbs state it clearly on their packaging.
- 2700K: exceptionally warm, candlelight-like and suited to intimate corners
- 3000K: warm white, suitable for paths and terraces
- 4000K and above: a cooler white, best kept for work zones or security lighting only
Replace cold-white bulbs in external fittings with 2700–3000K alternatives. For portable or battery-powered lights, select products explicitly labelled “warm white”. This usually takes only minutes and often requires no tools.
Warm light on a bare winter tree can look more inviting than a full summer border lit in cold white.
Stop illuminating empty space and start creating a story
A common error is arranging identical solar posts along a path at perfectly even intervals, like runway lights. They indicate where to walk, but offer little else. The grass remains featureless, shrubs disappear, and the garden seems smaller than it really is.
Effective exterior lighting approaches the garden as a compact stage: you decide where the “actors” should appear and where viewers should look first.
Choose your stars before choosing your spots
At night, stand by your living-room window and assess the view. Look for three to five features that deserve attention:
- a twisted tree trunk or striking arrangement of branches
- a stone wall, fence panel or textured façade
- ornamental grasses that sway in the breeze
- a substantial pot or sculpture beside the terrace
Set a small spotlight at the foot of each chosen feature, directing it upwards or across the surface. Up-lighting or side-lighting brings out forms that are easily missed during daylight. Branches cast lengthy shadows, grasses sparkle, and even an ordinary timber fence develops dimension.
Lighting a single tree well often has more impact than lighting your entire lawn badly.
Why darkness helps create a cosy garden
People often attempt to solve a dim garden by installing ever more lights. This can leave the area feeling like a supermarket car park. With no dark areas for the eye to settle on, the view from indoors becomes an indistinct bright haze.
Within lighting design, darkness has the same role as silence in music: it establishes rhythm and allows the illuminated moments to stand out.
Keep obvious spaces between pools of light. Let sections of lawn or hedge recede gradually into shade. This contrast makes every lit feature seem brighter without increasing energy consumption.
The most atmospheric gardens at night are not the brightest ones, but the ones with confident shadows.
This considered approach benefits wildlife too. Continuous artificial lighting causes difficulties for moths, bats and hedgehogs. Leaving areas darker, particularly those farther from the house, limits light pollution and supports the nocturnal creatures that help keep the garden in balance.
No electrician or drilling: the growth of “nomad” lighting
Not long ago, a well-lit garden required cables, trenches and a professional installer. Cordless technology now offers a different option for renters and homeowners reluctant to make permanent changes.
| Type of light | Best use | Main advantage |
|---|---|---|
| Solar spotlights | Emphasising trees, walls and statues | No wiring; they charge in daylight |
| Rechargeable table lamps | Terraces, balconies and eating spaces | USB charging and easy repositioning |
| Battery-powered fairy lights | Railings, pergolas and shrubs | Gentle background illumination and straightforward installation |
Contemporary solar lights store more power and can operate even after overcast winter days. Numerous models include sensors that switch them on automatically at dusk. Rechargeable lanterns, frequently powered through USB-C, can last for a whole evening from one charge before being brought back indoors.
Their chief advantage is adaptability. You can experiment with placement, direction and height without committing to wall holes or fixed wiring.
Think of cordless lights as garden furniture: you rearrange them with the seasons and with your mood.
Making the garden a visual extension of your living room
When the lighting is warmer and more selective, the garden no longer looks like a black space beyond the glazing. Instead, it begins to feel like an additional room.
From the sofa, the eye can travel along an illuminated path towards a glowing tree, then onwards to a pot on the terrace. At night, the window stops functioning as a mirror because the outdoor scene is sufficiently bright to keep your attention.
Even a compact flat can appear larger as a result. A balcony with a warm table lamp and one illuminated planter gives the indoor view more depth. You might not go outdoors in January, but your mind still perceives additional space.
A practical 20-minute makeover: one simple scenario
Picture a typical suburban garden with a patio, a rectangular lawn, a fence and a small tree.
- Minutes 1–5: turn off the harsh security floodlight and, where possible, change its bulb to a 2700K LED.
- Minutes 6–10: position a solar or battery-powered spotlight at the tree’s base, pointing it upwards through the branches.
- Minutes 11–15: use a rechargeable lamp or fairy lights around the seating area to form a warm “island” on the patio.
- Minutes 16–20: go indoors, switch off every other garden light and inspect the view. Alter the angles to prevent glare through the window.
After these three modest adjustments, the view has layers: a welcoming terrace, the featured tree and darker space behind it. The garden appears deeper and more secluded, with no need to contact an electrician.
Key terms and minor risks to understand
Two terms commonly found on product packaging are “IP rating” and “lumens”. An IP rating indicates how well a fitting resists water and dust. In an uncovered garden, choose at least IP44; for ground spotlights that face heavy rain, higher ratings provide added reassurance. Lumens indicate brightness. Accent lighting seldom needs very high outputs: roughly 100–300 lumens for each spotlight will normally create a soft effect.
A few precautions will help ensure the result remains safe and enjoyable. Do not set bright lights at eye level if they shine straight into neighbours’ windows or towards drivers passing by. Bring rechargeable units inside during severe frost when the manufacturer recommends doing so. Also, keep leads from plug-in lights clear of walking routes to prevent trips.
When used carefully, portable warm lighting does more than provide decoration. It changes the experience of long winter evenings, transforms a black rectangle into a living picture, and may even make an evening at home feel like a pleasure rather than a compromise.






Comments
No comments yet. Be the first to comment!
Leave a Comment