
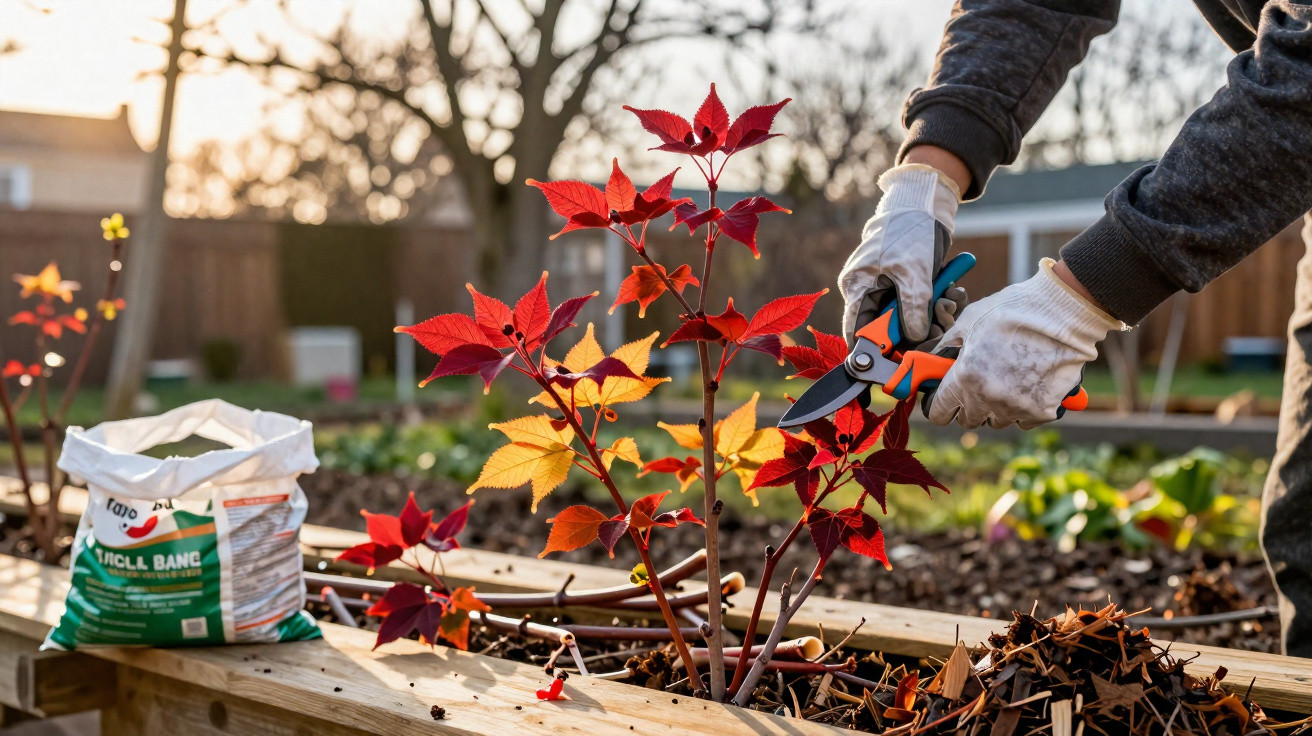
Many garden owners wonder why the Cornus shrubs next door look like blazing torches in winter while their own resemble nothing more than grey-brown sticks. The answer is not some secret cultivar, but a precise pruning strategy – and late winter is exactly when it matters.
Why Cornus often looks dull in winter
Cornus species such as common dogwood (Cornus sanguinea) and Cornus alba rank among the garden’s most interesting winter shrubs. Depending on the cultivar, their young stems shine in vivid red, orange, yellow or even two-tone colours. Yet after several years, this display often fades into a tangle of grey growth.
The explanation is the age of the stems. As they mature, the bark develops a thicker, rougher covering and the pigments gradually disappear. Although this helps the shrub withstand cold and weather, it also removes its ornamental appeal.
“Only young wood develops intense colour – anyone who does not prune is voluntarily giving up spectacular winter colour.”
A Cornus left entirely to its own devices will continue growing, but it will look more tired with each passing year. To retain the colour, you need to encourage the plant to produce fresh wood on a regular basis.
Why mid-February is such a critical time for Cornus
It is not merely the act of pruning that matters, but above all the timing. For Cornus shrubs, the best period is late winter, roughly from 10 to 25 February. During this short window, the plant is already preparing internally for spring and its buds are close to breaking.
If you reach for the pruners much earlier, the cuts remain exposed for longer and may be damaged by severe frost. Leave it until well into March and the shrub will already have invested energy in shoots that are then removed. Either approach places unnecessary strain on the plant.
Prune at the right moment and the reverse happens: the shrub closes its wounds quickly and directs all its spring energy into vigorous new shoots – the very stems that should glow next winter.
How to tell which stems need removing
Many amateur gardeners cut back Cornus a little “by feel” and then wonder why the desired result does not appear. The key is to remove old wood deliberately while supporting the youngest stems.
You can judge the age of the branches quite easily from their appearance:
- 1-year-old shoots: very smooth, comparatively thin and strongly, clearly coloured in intense red, yellow or orange.
- 2-year-old shoots: still coloured, but slightly duller at the base, with the first side branches.
- 3 years and older: grey-brown, cracked and often marked by thickened areas and small irregularities.
For a genuinely spectacular colour display, only young wood counts. Anything that is clearly ageing takes light and space away from younger stems.
“The courage to prune pays off: anyone who consistently removes old wood brings the colour back to eye level.”
Radical or gentle? Two strategies for the ideal winter pruning
The hard approach: complete cut-back (recépage)
For the greatest impact, choose a particularly decisive method. Specialists call it coppicing. Using sharp, clean secateurs or sturdy loppers, cut all older stems back to around 10 to 15 centimetres above ground level.
Robust cultivars such as Cornus alba ‘Sibirica’ cope with this cut-back without difficulty. The shrub responds with a dense cluster of fresh, richly coloured stems. This technique is especially suitable for free-standing specimen shrubs intended to be a winter focal point.
Many professionals carry out this radical treatment regularly every one to two years. Some amateur gardeners are initially reluctant because the shrub almost disappears immediately after pruning. Within only a few weeks, however, it grows back strongly, and the following winter reveals the full effect.
The cautious approach: phased pruning
If your Cornus shrubs form part of a mixed hedge or sit at the back of a border, a more moderate approach is possible. Each year, remove only around one third of the oldest stems at their base. This gradually rejuvenates the shrub without making it appear completely “bare”.
This works particularly well for older specimens that have already become heavily woody. After three years of consistent work, the border will contain a noticeably younger, more colourful shrub that has nevertheless retained its structure.
Step-by-step Cornus pruning
- Select a suitable day from mid to late February, ideally when it is frost-free.
- Sharpen and disinfect your tools so that pruning wounds heal faster and more cleanly.
- Assess the shrub from the outside: where is the old grey wood, and where are the young coloured shoots growing?
- Cut old stems directly at ground level or just above it.
- Remove branches in the centre, those growing inwards and any crossing stems, allowing light to reach the middle.
- Thin out young shoots that are growing too densely, so they can develop strongly upwards.
After pruning, the shrub should look open, leaving room for fresh upright stems to grow. Careful work at this stage creates the visual foundation for the following winter.
Care after pruning: fertiliser, mulch and water
Such substantial pruning demands effort from the plant. The shrub responds with a growth surge and needs nutrients to support it. A bucket of mature compost or an organic balanced fertiliser around the root area will restore the necessary energy.
Loosen the soil lightly with a rake so the fertiliser can work its way in. Then apply a thin layer of mulch made from bark chippings or leaves to help retain moisture in the ground. In particularly dry springs, additional watering is also worthwhile, preventing the new shoots from faltering straight away.
“Anyone who feeds and mulches after pruning will be rewarded with strong, thick coloured stems – rather than thin, weak strands.”
What else you can do with the cut branches
The removed stems are surprisingly often sent straight to the green waste collection. That is a mistake, because red and yellow branches in particular are suitable for numerous creative uses.
- Indoor decoration: A bundle of Cornus branches in a glass vase creates a minimalist decorative feature.
- Natural plant supports: In the vegetable patch, straight stems can support peas, beans or mangetout.
- Woven features: The flexible shoots can be used to make small wreaths, border edges or decorative objects.
Those with a skilled hand can even use the branches for simple weaving projects. Younger stems in particular bend well without snapping immediately.
Which Cornus cultivars are especially striking
Not every Cornus produces precisely the same colour effect. Some cultivars are particularly well known for their spectacular winter stems. Examples include:
| Cultivar | Stem colour | Special feature |
|---|---|---|
| Cornus alba ‘Sibirica’ | vivid red | ideal for hard cut-backs, very hardy |
| Cornus sanguinea ‘Midwinter Fire’ | fiery red-yellow | colour transition from yellow through orange to red |
| Cornus stolonifera ‘Flaviramea’ | pale yellow, almost neon-like | perfect for contrast against dark backgrounds |
These colours stand out especially well alongside evergreen shrubs, dark conifers or snow-covered ground. Combining several cultivars creates an almost painterly winter scene in different tones.
Common mistakes – and how to avoid them
The same problems with Cornus shrubs recur in gardens time and again. A few adjustments can resolve them easily:
- Mistake: Cutting back only the tips.
Better: Remove old wood at the base and retain the younger stems. - Mistake: Not pruning at all for years.
Better: Rejuvenate gradually over several winters, removing the oldest stems each time. - Mistake: Pruning immediately after a hard frost.
Better: Wait for mild, largely frost-free days in late winter.
Treat your Cornus in this way and you will quickly see its response: strong new growth and intense colour.
What beginners should also bear in mind
New gardeners in particular often ask whether such a hard cut-back can harm the shrub. For healthy, well-established Cornus plants, the opposite is true. This woody plant is among the more resilient species and readily produces new growth from the base. Only newly planted, very young specimens benefit from greater caution during their first one to two years, with gentler rejuvenation being preferable.
If several shrubs are planted in a row, you can vary the pruning intensity: cut one shrub back radically, prune the next only partially and leave the third almost untouched. This creates a layered effect that changes from year to year and continually reveals new colour nuances.

Comments
No comments yet. Be the first to comment!
Leave a Comment