
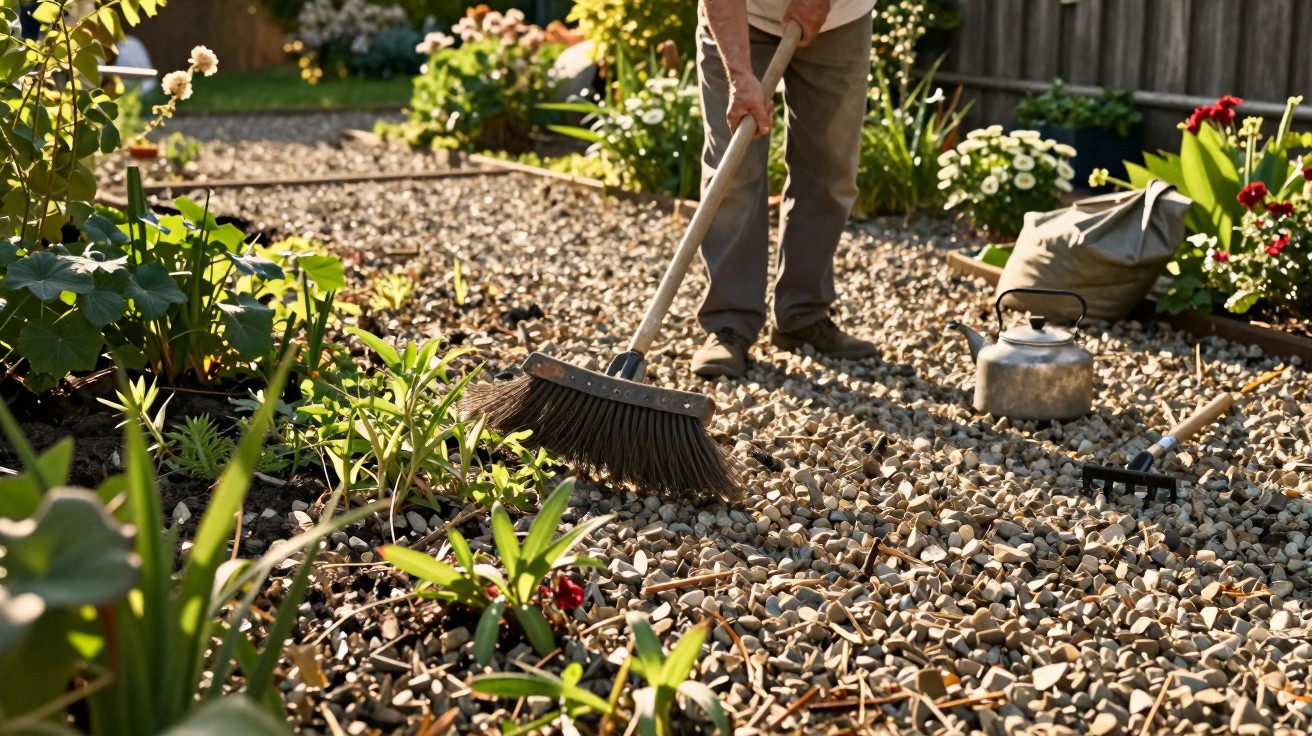
Before summer arrives, many gravel paths in the garden risk becoming a weed nightmare – acting in good time can save hours of weeding.
Purslane, dandelions and couch grass can suddenly emerge between the stones. Constant bending soon causes backache, while strict water restrictions also apply in many areas. Many amateur gardeners eventually give up in frustration or reach for chemical weedkiller. Yet three targeted, natural measures can make keeping a gravel path clear far less demanding.
Why a gravel path becomes overgrown so quickly
Gravel looks tidy, contemporary and easy to maintain, but it is not entirely maintenance-free. The stones do not create a sealed surface: they allow air, light and organic matter to pass through. Over time, dust, leaves, pollen and tiny pieces of plant material collect in the gaps.
This creates a thin, fertile layer in which seeds carried by wind, birds or pets can germinate without difficulty. Growth is especially rapid when:
- the gravel layer is too thin;
- rounded, loose-moving stones have been used;
- the base has not been compacted properly;
- fallen leaves and grass clippings are left in place.
As soon as temperatures rise and there is the occasional heavy shower, wild plants have ideal conditions for getting established. Even in very dry areas, brief summer thunderstorms are often enough.
If the plants are simply allowed to grow, their roots become tangled with the base layer, retain moisture in the ground and can eventually turn isolated areas into muddy, slippery patches. At the same time, more and more organic material builds up in the path, creating a self-perpetuating cycle for further waves of weeds.
Weeds in gravel are not a sign of “poor-quality” gravel, but of too many nutrients and too much light reaching the ground.
Using a chemical total herbicide now does not just harm soil life and insects. Many products can contaminate groundwater and surface water, and may no longer be permitted at all in front gardens, driveways and public areas.
Three natural strategies to keep a gravel path clear all summer
The good news is that three straightforward, largely mechanical methods can keep the path tidy without a watering can or chemicals. The key is to start early, ideally in late spring before the major heat arrives.
1. A mineral “shield”: careful construction and upgrading
Anyone planning a new gravel path, or intending to renovate an existing one thoroughly, can now lay the foundations for less work in the years ahead. The aim is to prevent light from reaching the soil while still allowing rainwater to drain away.
A tried-and-tested construction consists of:
- Removing old weeds as completely as possible, digging out roots or loosening them with a patio-joint hoe.
- Levelling and compacting the base well, so dips do not form later.
- Laying a permeable geotextile, also known as root-barrier or weed-control fabric, which lets water through but slows weeds rising from deeper layers.
- Adding an even layer of angular, crushed gravel, around 5 to 7 centimetres deep.
Why use crushed gravel in particular? Its sharp edges interlock more effectively, shift less readily and allow less light to reach the ground. Rounded decorative pebbles may look elegant, but they leave more gaps.
A defined edge restraint is equally important, using kerbs or metal edging for example. This keeps the gravel where it belongs and stops lawn from spreading into the path.
A properly constructed base with weed-control fabric and a sufficiently deep layer of angular gravel prevents most later weed problems.
Even if a complete rebuild is not an option, improvements can still be made. Rake through the existing material, remove heavily weeded sections, insert fabric in selected places and top up with fresh crushed gravel. It takes some time, but substantially reduces future maintenance.
2. The “magic brush”: brief sessions, major results
The second essential is a simple but consistent routine: brush rather than bend. Dedicated patio-joint or path brushes with metal bristles dislodge young shoots and moss without requiring constant crouching. For many gravel paths, a very stiff plastic brush on a long handle also works well.
A quick session every two weeks during the growing season is ideal. At that point, very young seedlings can be rubbed out quickly before they develop established roots.
Practical tips for a brushing routine:
- Work early in the morning or after light rain, when the ground is slightly damp.
- Move across the surface in circular motions, much like scrubbing.
- Be particularly thorough along edges, in gaps and at transitions, as weeds often start there first.
- Collect the loosened plant material immediately with a broom or rake and dispose of it.
Leaving the debris behind simply creates another thin layer of humus, and the next generation of wild plants is already waiting to emerge. The brushed-out material should therefore go on the compost heap or in the garden-waste bin.
3. Boiling water for particularly persistent clumps
Despite weed-control fabric and brushing, there will usually be a few exceptionally stubborn plants left behind: couch grass, plantain and deep-rooted dandelions. For these cases, there is a surprisingly effective method that uses no chemicals at all: boiling water.
Using a kettle or jug, ideally with a spout, pour the hot water precisely over the root area. The heat destroys cell structures in leaves and roots within seconds. Shallow-rooted species such as chickweed or young purslane often succumb after just one application.
A few points will keep this method safe:
- Use it only on gravel and paved surfaces, never in borders or on lawns.
- Aim accurately to avoid scalding ornamental plants.
- Repeat after 10 to 15 days if individual clumps start growing again.
- Apply it only on dry days, so the water cools quickly and does not run across a wide area.
Boiling water works locally, dissipates quickly and leaves no residues in the soil – making it ideal for small problem areas on a gravel path.
How often does a gravel path really need attention?
Many garden owners overestimate the amount of work involved. Those who prepare the gravel path thoroughly in spring will generally need only brief, regular sessions over summer:
| Period | Task | Frequency |
|---|---|---|
| Spring | Thorough cleaning, check the weed-control fabric, top up gravel | Once |
| May–August | Brush the surface | Every 2 weeks |
| May–August | Apply boiling water to problem areas | Every 10–15 days as needed |
| Autumn | Remove leaves, rake through the surface | 1–2 times |
Following this schedule removes wild plants before they can set seed. As a result, the pressure decreases a little more each year.
How these methods differ from chemical weedkiller
The three measures described rely not on poison, but on simple drying out, blocking light and mechanical removal. This protects soil organisms, earthworms, wild bees and other beneficial insects in the garden.
Chemical products usually kill every plant in the treatment area, including small desirable seedlings from an adjacent border. Residues may also move into neighbouring areas. This is particularly problematic on driveways, near drains and on sloping ground. In many local authority areas, such products are even prohibited on private paths.
The mechanical approach needs a little more planning, but saves water and reduces work over the long term. Keeping a brush and kettle ready by the garage or in the garden shed makes gravel-path maintenance a minor task that can be completed in five to ten minutes.
Additional tips: deliberately allow plants or keep the surface consistently clear?
One final question concerns many gardeners: does a gravel path really need to be completely “sterile”? Some people intentionally leave low-growing, tread-tolerant species such as thyme or Roman chamomile around the edges. This attracts insects and creates a more lively appearance.
Anyone taking this approach should define clear zones: a genuinely clear central walking area, with side strips where plants are tolerated or even deliberately planted. The three measures described are then used primarily on the main path, while the edges can be designed intentionally.
For driveways, step-free access routes or shaded areas, however, a consistently clear surface is recommended. Wet leaves and tall weeds can quickly become a slipping hazard there. The same principle applies here: the better the construction in spring, the more relaxed the summer will be.
Replacing routine chemical use early on with weed-control fabric, gravel, a brush and hot water keeps a gravel path permanently clean, saves water and avoids dependence on increasingly strict rules governing the use of weedkiller.



Comments
No comments yet. Be the first to comment!
Leave a Comment